I’m a blogger. Diana is a blogger. And a small group of you are probably bloggers too, right? Today I’m here to share a little Blogger How-To that I figured out with a little trial & error that I know some of my blogger friends out there are itching to hear.
I’ve been blogging on Home Coming for a little over a year now and have DIY’ed a ton of projects and made a lot of progress on our house – but my “standard” navigation through blogger wasn’t making it very easy for my readers to see all of those great projects in a quick and easy way. Digging through archived posts is just not something I wanted to put everyone through!
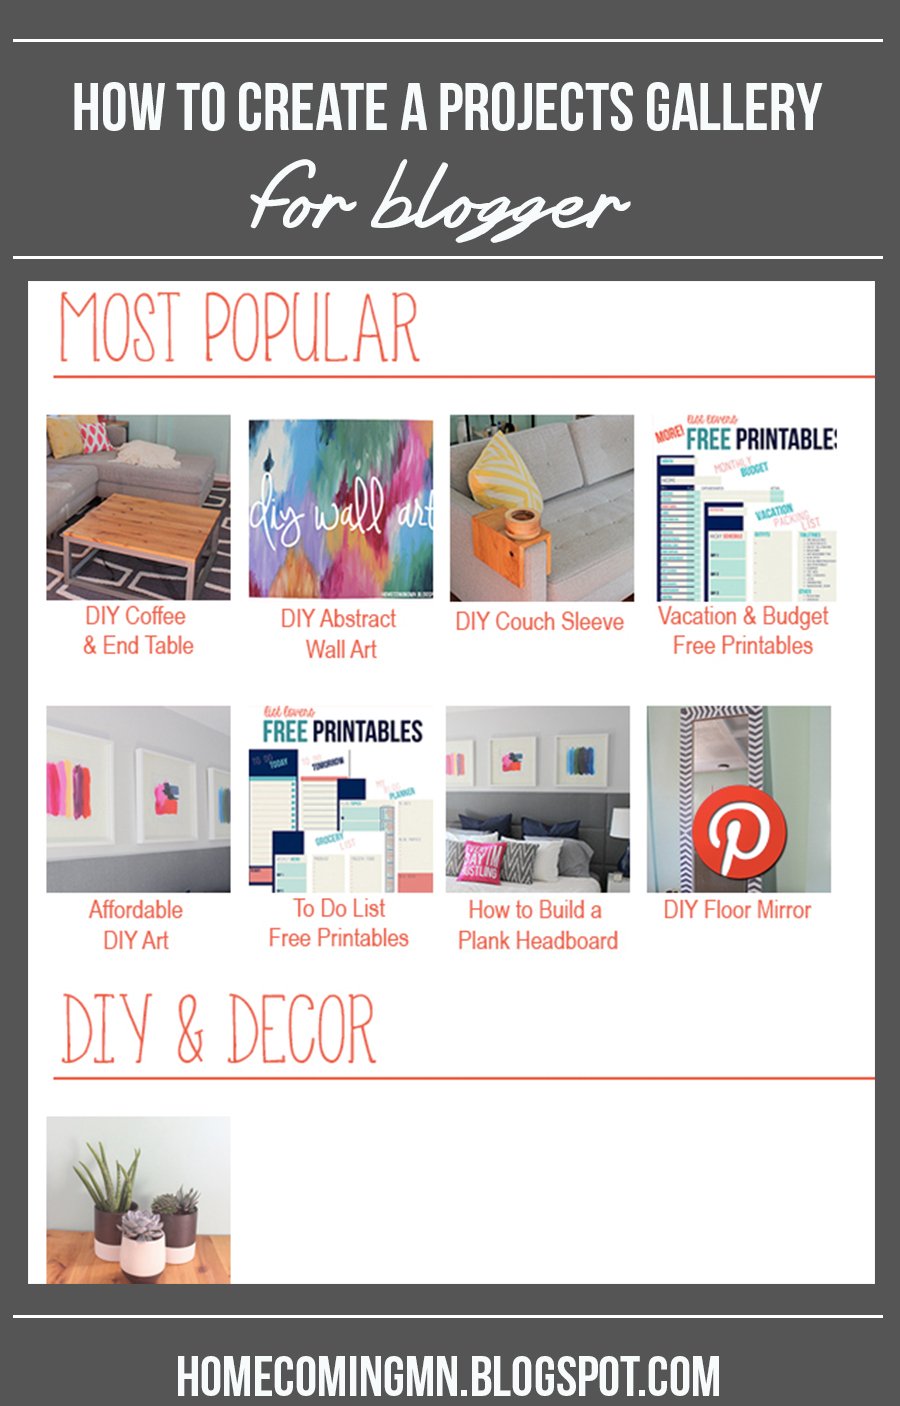
So after some time and little effort (no coding!!), I put together a Projects Directory on my blog, as well as a Remodeling Directory and a House Tour using the following instructions.
How to Create a Projects Directory on Blogger
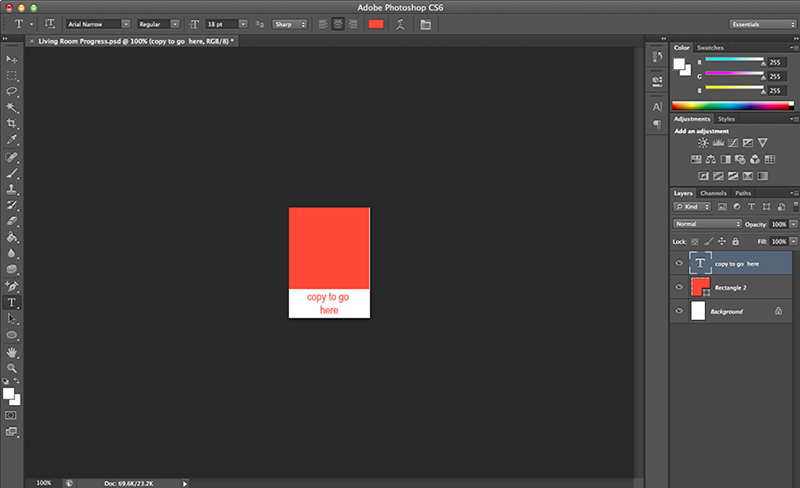
Step 1: Edit your photo and create a thumbnail for your project. I created a template in Photoshop in which I’m able to quickly place a new image + headline. I built my thumbnails at 132×180 pixels which allows for four wide in my blogger template.
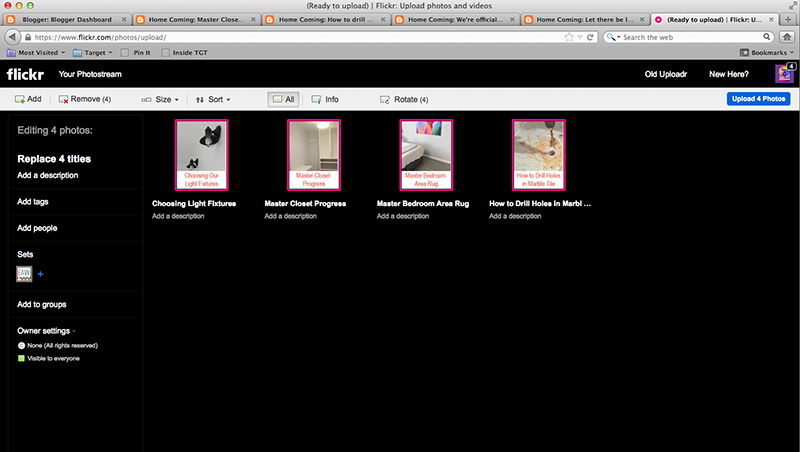
Step 2: I use Flickr to host all of my photos, so I uploaded all of my completed thumbnails so I could use the HTML’s in the next couple steps.
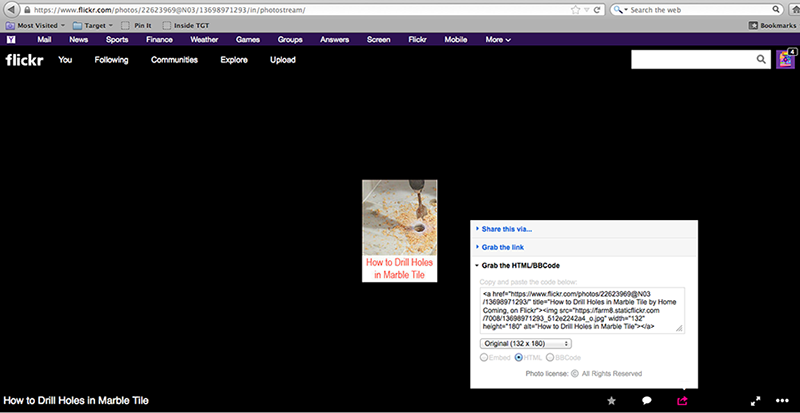
Step 3: Grab the HTML of your thumbnail from which ever photo platform you use at the “original” size.
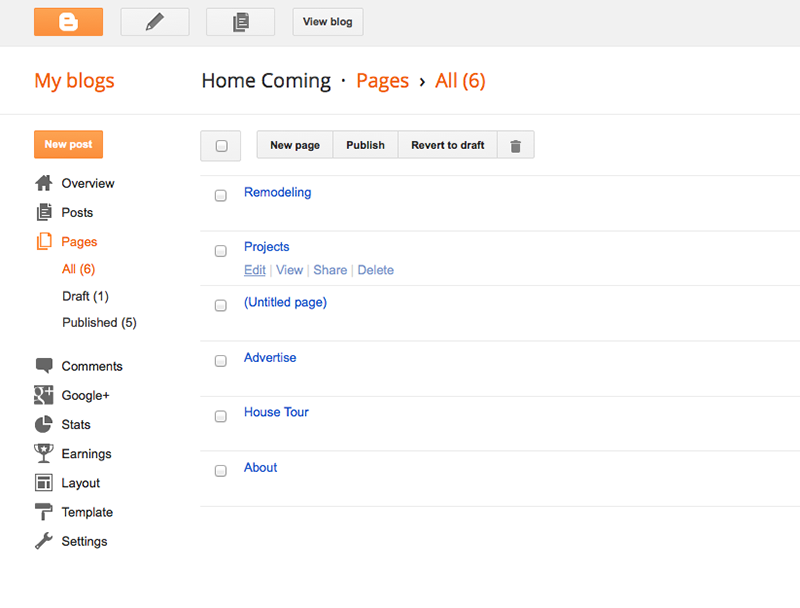
Step 4: Head on over to Blogger. Projects is one of my “Pages” on blogger which I have set up as part of my top navigation. On your Pages page, click on Edit.
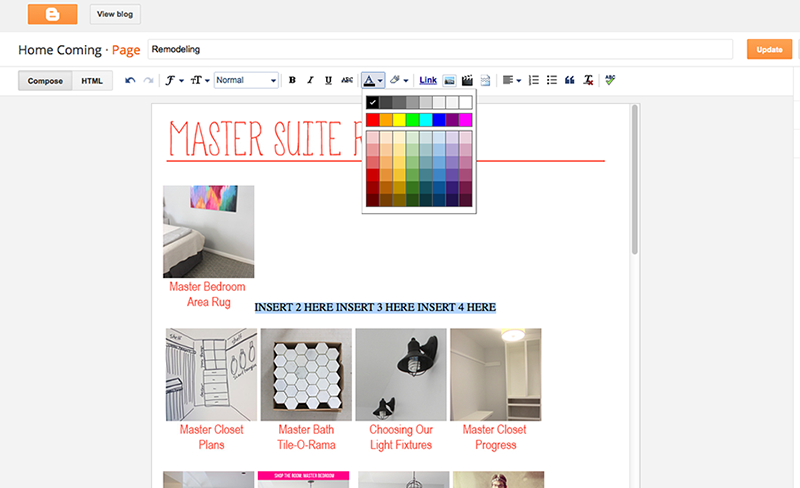
Step 5: As a way to make the HTML easier to understand, I tend to write “INSERT # HERE”. This is where you’ll past the HTML code from your thumbnail in Flickr (or whatever program you use). You can easily turn the text white so no one can see it but you in the HTML if you want to use this trick.
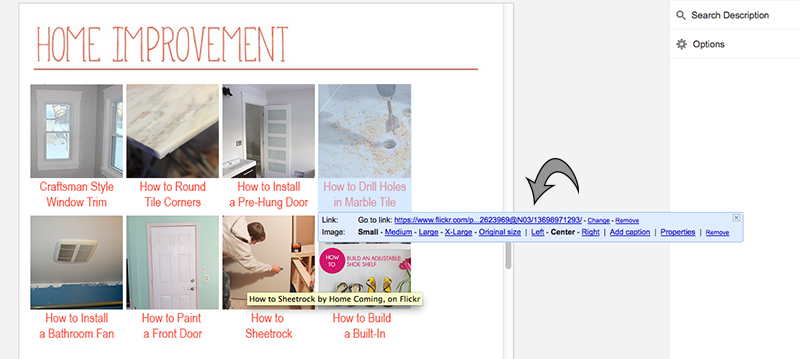
Step 6: Once you have your thumbnail inserted, click on it, and the below box will show up. You can see from the below that it says “Go to Link: www.flicker.com/blahblahblah”. Click on “Change”.
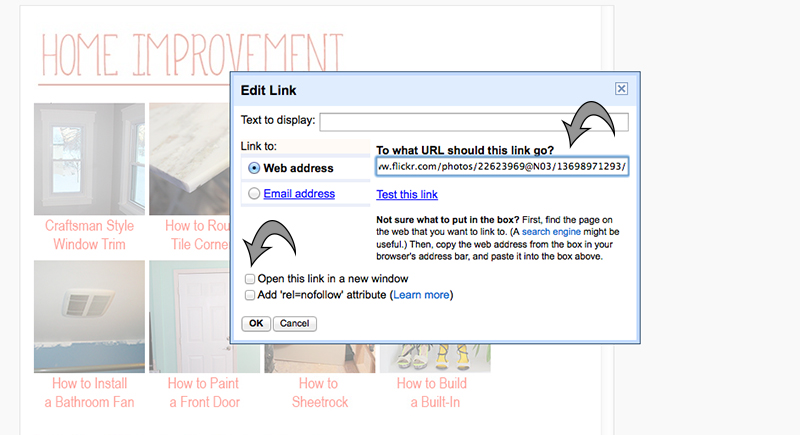
Step 7: After hitting the change thumbnail, insert your blog post’s URL in the Web Address Box. Then click on the first box in the thumbnail left.
And there you have it. Your very own projects directory! Arrange your photos however you’d like them, at whatever sizes you’d like depending on how large you’d like your thumbnail. BeaUtiful.
Leave a comment if you have any questions. I’m happy to help!
Want to learn more about me or see my DIY Projects? Swing on by Home Coming and check us out!





Great tutorial! I would like to add this to my blog too. Quick question though…do you have to do this process on every post to get the directory to appear or is there a way to add it to the layout so that it appears on every post without having to recreate it every time?
Unfortunately I haven’t figured out a way for this to automatically add to layout. I’m sure there’s a way, but I”m just not a coding expert. What I do is each Friday I put together all of my thumbnails for the week and knock it out in under 30 minutes. If you create the template in photoshop for your thumbnails, it’s super fast. Hope that helps!
Great tutorial! I definitely need to do this! It really doesn’t look too difficult, just a little time-consuming. Thanks for sharing!
I hope it helps, Lyndsay! It definitely is time consuming on the up-front, but once you’re caught up, it’s an easy job to keep up. Good luck!
I started this tonight, and it’s going to take some time to build a gallery of all of my projects, but this tutorial is GENIUS! So easy to follow, and it looks great! Thank you so much for sharing!!
Of course! I’m glad to hear that it helps. It is a little time consuming on the front-end, but it will be SO worth it once you have your own projects gallery. Good luck!
This is amazing! I built a project gallery on my blogger blog, but it’s pretty hard to add in new projects, so I think I might start from scratch with this method. Thank you!!
I hope it helps!
Thanks for the great tutorial. Can you please email me and explain to me how to get the actual image into the template in Step 1??
I’m having trouble trying to figure it out. thetelltaletasha@gmail.com