
This post was brought to you in partnership with The Home Depot and ScotchBlue™ Painter’s Tape.
I am SO excited to share this project with you. Not only do I get to participate in the Ready, Set, Paint Blog Hop sponsored by ScotchBlue™ Painter’s Tape and The Home Depot but I used some power tools for the FIRST time doing this project. Insert cheesy smile!
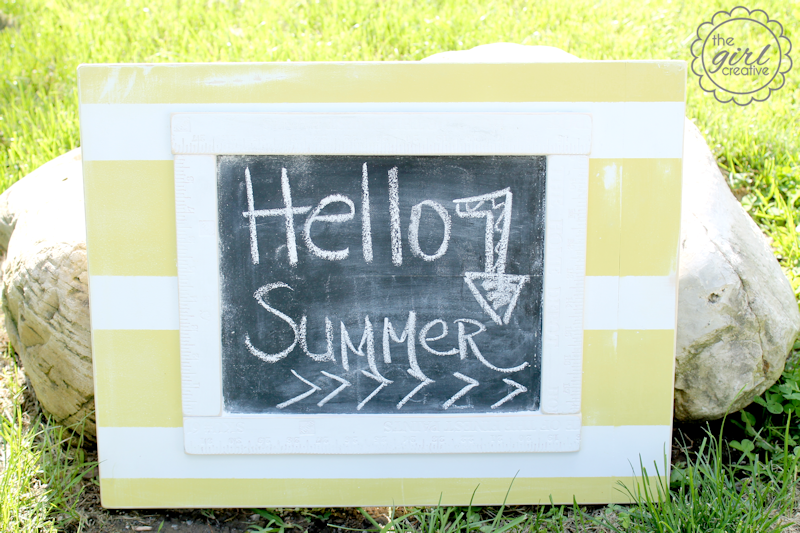
Chalkboards are so popular these days and so much fun to use whether you are a child or an adult so I decided to make one just in time for Summer. I plan on hanging it on the gate to my backyard for some parties and get-togethers we have planned for this Summer. Heck I even have visions of using it for our Lemonade Stand and the summer mantle.
I took off to Home Depot today with a few basic thoughts in mind and ya know when you have an idea and it looks amazing in your head until you do it and it turns out to be a huge craft fail? Well, I was hoping and praying that this did not happen to me! Thank God it didn’t and I could not be happier with how this turned out.
The Supplies:
Wood Board (I had mine already)
ScotchBlue™ Painter’s Tape
2 Yard Sticks
1 Can of Rust-Oleum Spray Paint and Primer in 1
1 Can of Rust-Oleum Spray Paint in Yellow (satin finish)
150 Grit Sand Paper
1 Can of Rustoleum Chalkboard Paint
Wood Glue
{all of these supplies can be purchased at The Home Depot.}
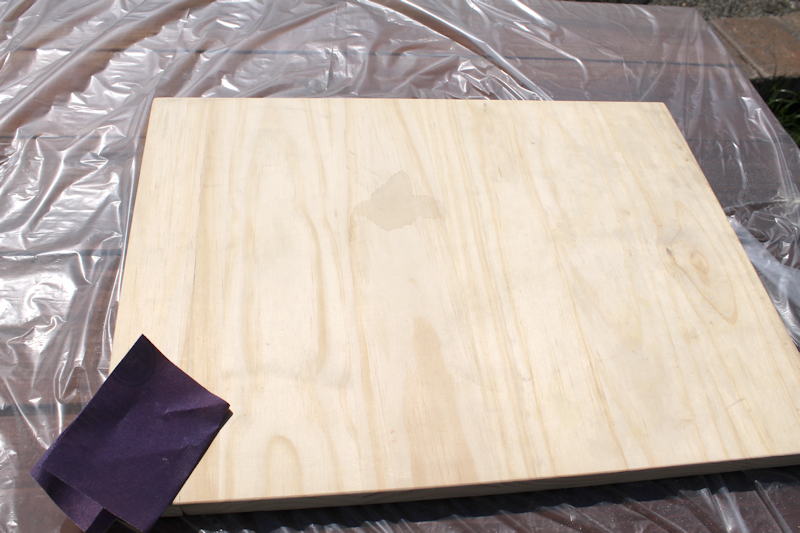
Step One: If needed sand your wood down to a smooth surface. Even though the wood I had on hand was already smooth I went over the whole thing with sand paper just in case.
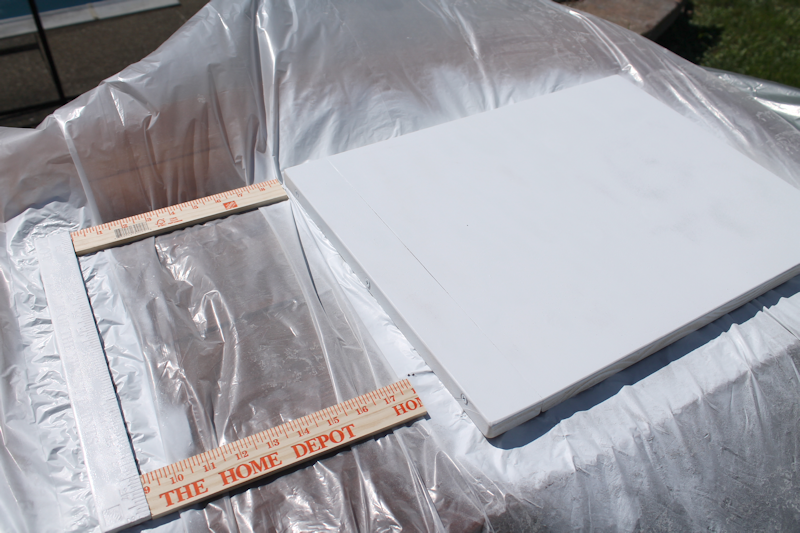
Step Two: Spray the wood with your first coat of paint. Thankfully I happened upon Rust-Oleum’s paint and primer in 1. It really saved me some time. If you don’t have the 2-in-1, then prime your board first.
Somewhere in between the painting I took my yard sticks and cut them down to size (using my CHOP SAW…YEAH BABY!!) so that they would act as a frame. The size is relative. Once you have your main piece of wood you can decide how much of a chalkboard you want and then cut your yard sticks accordingly.
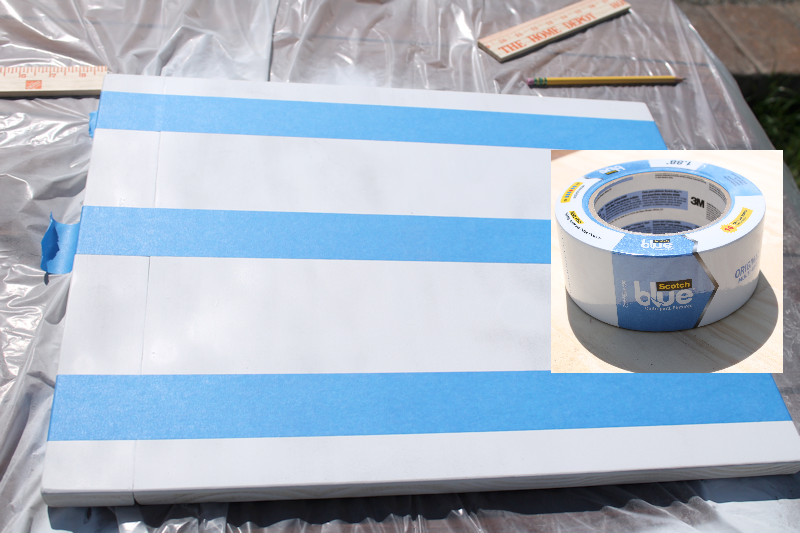
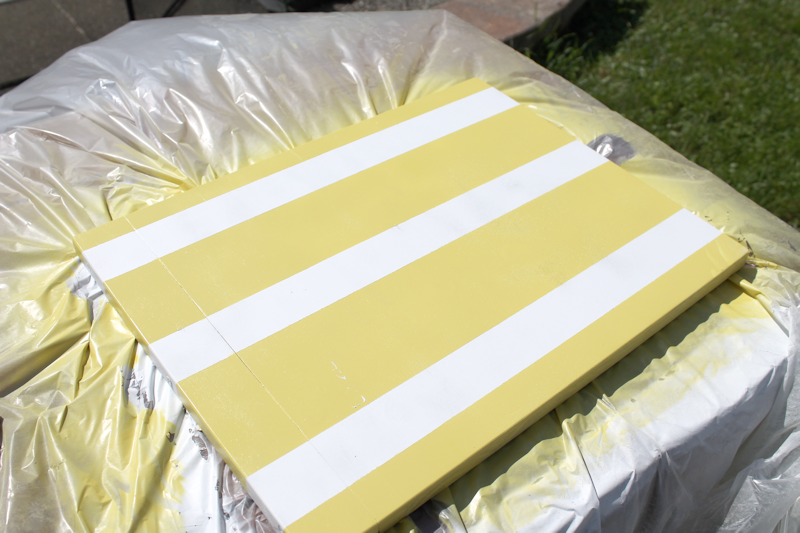
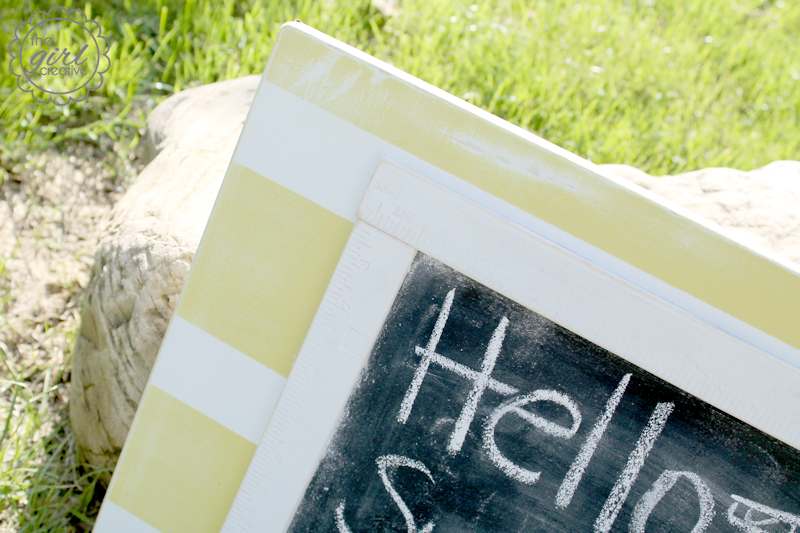
Step Three: After the first coat of paint is dry, create your stripes using ScotchBlue™ Painter’s Tape and paint your second coat over the whole board.
Nice yellow stripes!
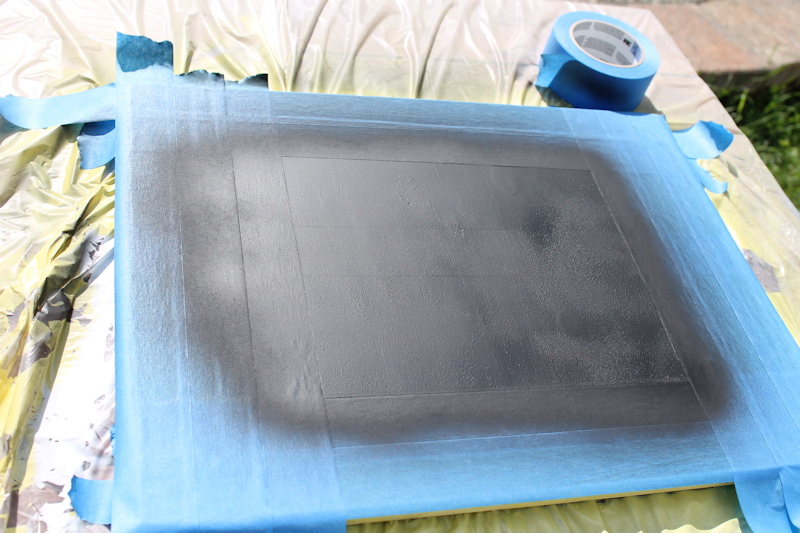
Step 4: Take your yard stick pieces and lay them out on the wood. Once you have them in place, trace the inside of your frame lightly with a pencil and section it off with painters tape to protect the area you don’t want painted black. I followed the directions on the can and used 3 coats of chalkboard paint.
Step Five: Remove the tape after the chalkboard paint is dry and glue your yard sticks in place around your chalkboard using wood glue. Once it’s dry, take your sandpaper and rough up the edges and any section of the painted wood that you might want to look a little worn. This works great if you have any imperfections in your paint job. Just sand a little paint off here and there and it looks great.
Step Six: Take a piece of chalk and using it’s side, color in the whole chalkboard. Erase and it’s now ready to write on.
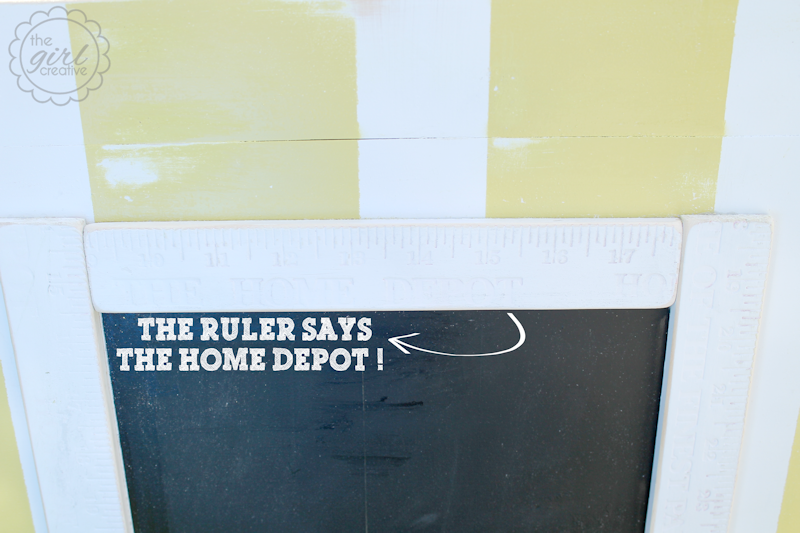
I didn’t really plan this when cutting my yard sticks up but I thought that this was pretty cool………especially since this project IS sponsored by The Home Depot. If you look close you can see that the frame says “The Home Depot”.
For more inspiration check out these amazing projects from Centsational Girl – Textured Panel Dresser Makeover, Thrifty and Chic Framed Stencil Wall and The Design Confidential DIY Concrete Color Block Painted Tables . You should also check out the Ready, Set, Paint Blog Hop
Giveaway Prize: $75 Home Depot Gift Card
Mandatory Entry:
To enter this giveaway, please leave a link to your favorite summer DIY or painting project in the comments below for a chance to win a $75 Home Depot gift card!
A winner will be chosen using random.org on Friday June 14 and will be notified via email.


This post was brought to you in partnership with The Home Depot and ScotchBlue™ Painter’s Tape.
Follow Scotch Blue on Social Media
Pinterest // Facebook // Twitter
::AND::
The Home Depot



http://thespacebetweenblog.net/2012/07/10/pallet-word-art/
Well, it’s not the most glamorous project but it is definitely worth knowing and doing!- maintaining the lawnmower.
http://www.homedepot.com/webapp/catalog/servlet/ContentView?pn=Maintaining_Your_Lawn_Mower&storeId=10051&langId=-1&catalogId=10053&cm_sp=knowhow-_-top_projects8-_-lawnmower_maintainence-_-march09
Looks like a great idea!!!!! Here’s something I think the kids would like to try…we always have tons of pics, and nothing to do w/them all!! 🙂
http://www.diynetwork.com/decorating/how-to-make-a-photo-display-and-message-board/pictures/index.html
I hand paint wooden signs and have been dying to try a pallet sign (similar to this: http://www.bloominghomestead.com/2012/09/pallet-wood-sign.html). I absolutely love the sign you made and will have to try making one soon!!!
Hope I “entered” for that giveaway the right way:)
http://www.birdsandsoap.com/2013/06/cooler-stand-diy-tutorial-fathers-day.html
Can’t wait to make this!
Here’s a fun and easy one to spruce up your laundry room this summer! http://www.diyinspired.com/etched-glass-laundry-detergent-container/
Love your chalkboard! Here’s a recent paint project of mine: http://anightowlblog.com/2013/05/diy-monogrammed-tray-with-scotchblue-painters-tape.html
Oh my, I LOVE this tutorial! And what a great giveaway!
So cute! I love the striped frame of this chalkboard! I hope I win b/c I need paint! 🙂
I can’t wait to paint my kitchen cabinets & walls this long 4th of July weekend!
I love this idea and totally think I could elaborate on it for the flowerbeds! 🙂
http://www.justusfourblog.com/2013/06/wood-shim-artwork/
I love this table: http://pinterest.com/pin/131800726567025468/
Great giveaway! Thanks for hosting!! This is my fave project so far this summer…I painted a birdcage! http://chasethestar.net/2013/05/birdcage-gardening-project.html Love your project Diana!
Here’s a super easy way to bring summer yellow flowers into your home for just $3.25.
http://www.chicdesigngeek.com/diy-flowers-from-dollar-tree-for-3-25/
SUPER CUTE! Love the Yellow and White Combo!! SMiles, Jill
http://www.mommyiscoocoo.com/2012/06/diyhow-to-make-american-flag-pallet.html I am in love with this!
I made on outdoor wall plaque- which is both painting AND a summertime DIY! http://www.crafttestdummies.com/craft-projects-2/monogram-door-plaque-product-update/
Thank you for hosting the giveaway! : )
Turning a plain closet into an awesome mudroom! http://fortheloveofshorties.com/our-mudroom-came-outta-the-closet/
i like this idea. i wish there was a home depot close to where i live to be able to go to there diy programs for kids & grown-ups. i’m currently working on redoing an old piano bench using the blue tape to paint the top with 3 different colors & 3 colors on the feet & legs. a $75.00 card would be great to win. thanks for doing the giveaway. kenda
I’d love to build my own birdhouse for all my feathered friends.
http://www.diynetwork.com/decorating/building-a-birdhouse/index.html
Pallet furniture for the patio, with castors of course!
http://www.homedit.com/21-ways-of-turning-pallets-into-unique-pieces-of-furniture/
http://www.hiyaluv.com/2012/07/5-steps-to-bathroom-makeover.html
This is adorable! I love the summery colors you chose 🙂
http://www.prettyhandygirl.com/2013/05/build-your-own-kitchen-herb-planter.html
such a good idea! http://www.centsationalgirl.com/2013/05/textured-panel-dresser-makeover/
I love your blog. There are so many things I want to try
I’m always looking for unique picture frames…I can’t wait to make this.
http://www.shelterness.com/how-to-make-a-stylish-photo-frame-for-several-photos/
I’m currently in the middle of painting board and batten in my dining room
This is such a cute project! I’d love to make one for our kitchen.
http://www.mydaylights.net/2013/04/washi-tape-cabinet-organizer-upcycle.html
http://www.diyncrafts.com/1566/home/summer-garden-diy-project-make-your-own-garden-stones (the original post which I pinned, too)
Thanks for the opportunity to enter.
There are so many things I want to do this summer! This wreath is on the top of the list for sure! http://www.createcraftlove.com/2013/03/garden-hose-spring-wreath.html
I really want to finish de-brassing my house! This is on my list of things to do, and it’s definitely a SUMMER project- i.e., something you need to do outside, where the air clears quickly!!
http://www.younghouselove.com/2012/12/you-down-with-orb-yeah-you-know-me/
That is a cute project. I just bought some chalkboard paint and will definitely try this. Thanks.
http://laurieannas.blogspot.com/2012/06/diy-shutter-plate-rack.html
I’d love to try to make this.
http://pinterest.com/pin/194921490092975084/
Saw this project on PInterest. The link no longer works so I am not sure where it came from, but the image I pinned shows all the steps to make this cool botanical art. I think it would be a great project to do with the kids too!
I loved putting my garden together and making hand painted wood signs! http://delicateconstruction.com/2013/03/wood-garden-sign.html
Well, I do LOVE your chalkboard!! But if I had to pick something else, I’d choose this lemonade stand!
http://lilluna.com/tutorial-tuesday-vintage-lemonade-stand/
If I didn’t think my 30 year old self (cringe) would look ridiculous sitting behind it, I just might make one! 🙂
http://www.firsthomelovelife.com/2012/06/reeeeeemix-front-door-edition.html
http://lilluna.com/tutorial-tuesday-vintage-lemonade-stand/
This is a lemonade stand DIY I’ve been wanting to try ever since my son expressed an interest in having a lemonade stand. I always wanted one as a kid too! Hope I win the contest as June 14 is my birthday. Would be a great present.
What a cute project! This is one of my favs that I worked on last summer 🙂
http://www.waittilyourfathergetshome.com/2012/04/30/the-mad-planter/
In love with this table. http://www.copycatcrafts.com/tag/pottery-barn/page/5/
Would love to recreate this as a clock as well. Thanks for the chance.
This looks like it would be an awesome kid outside chalk board!
I actually thought about mounting on the swing set! 🙂
We’re building a house and it’s time to figure out something different for the stairs, since we don’t want carpet. I’m thinking of doing a chevron design and using painter’s tape to get the job done. Ironically I found this on the Home Depot website!
http://community.homedepot.com/t5/Indoor-Decor/How-to-make-a-chevron-pattern-on-stairs/m-p/42337/highlight/true#M812
I love gardening stuff so I will be attempting this rustic potting bench this weekend:http://www.bluefoxfarm.com/build-a-potting-bench.html
http://www.hgtv.com/kitchens/do-it-yourself-butcher-block-kitchen-countertop/index.html
Going to use MMS’s tutorial here for our kitchen remodel!
http://www.thegirlcreative.com/2013/06/11/diy-chalkboard.html 😉
I really want to stencil some curtains. The possibilities are endless!
http://alittleofthis—alittleofthat.blogspot.com/2011/05/stencil-your-own-window-treatments.html
http://www.dogsdonteatpizza.com/2013/05/from-curbside-castoff-to-little-farm-table.html
http://www.flamingotoes.com/2013/06/crush-of-the-week-think-pink-features-96/
I love these painted, stacked pots, may have to try something like this. http://www.homejelly.com/weekend-diy-project-stacked-planters-for-your-home-sweet-home/
Did something similar to this to my desk in my guest bedroom 🙂
http://blog.spoonflower.com/2012/12/project-revive-a-bedside-table-with-wall-decal.html
Something I am looking at trying in the near future.
Great tutorial! I hope I win this giveaway, I could really use this gift card!
This is my DIY summer project, except mine will be painted crystal aqua. Can’t wait to get it done!
http://www.lovepomegranatehouse.com/how-to-make-a-flip-down-media-drawer/
I think it is a tie between these two for my first summer projects. Both for school of course!
Paint Chip to do board: http://pinterest.com/pin/285837907572713763/
Share Chair: http://pinterest.com/pin/285837907572707557/
My favorite has to be: http://pinterest.com/pin/125467539591640525/
I’m on the hunt for the right piece of furniture to try something like this: http://www.twotwentyone.net/2012/07/dresser-turned-tv-stand/
We just bought a house and the back yard needs help and this is the project we want to do!
http://designdininganddiapers.com/2013/05/how-to-install-a-stone-patio/
http://www.thegirlcreative.com/2013/06/11/diy-chalkboard.html
My favorite summer DIY project is building shelves! I found some great plans online that I am wanting to tackle! Thanks so much for the giveaway!
Oops, here’s the link! http://ana-white.com/2010/10/plans/ten-dollar-ledges
This is a fun centerpiece for summer 🙂
http://www.marthastewart.com/273636/floating-flowers-platter-centerpiece
~Amy
I plan to do shelving and here is one possibility: http://mail.aol.com/37798-111/aol-6/en-us/mail/DisplayMessage.aspx?ws_popup=true
http://ana-white.com/2012/05/plans/birthday-seesaw
My DIY project is toddler busy boards! I plan to buy all kinds of fasteners to attach to a board as a learning tool for the kiddos at my work. I’m really excited about it!
This DIY painted peacock chair is beautiful!–http://pinterest.com/pin/400046379370526761/
I really want to add a pergola over our deck: http://www.bhg.com/home-improvement/patio/designs/patio-ideas/#page=4
demureprincess7(at)gmail(dot)com
I would love to do this dresser
http://www.centsationalgirl.com/2013/05/textured-panel-dresser-makeover/
The yellow stripes on this make…me…smile! Super cute!
Melanie 🙂
This is sort of summery! HA!
http://www.reasonstoskipthehousework.com/2013/03/childrens-abc-play-table/
http://www.homeologymodernvintage.com/2013/05/mason-jar-luminaries.html
So cute for outdoors!!
http://info.californiapaints.com/bid/227069/How-To-Use-DIY-Paint-Techniques…. love the look of rag rolling to paint! And distressing..I cant stop distressing everything I get my hands on!
I LOVE how your chalkboard turned out!! I love the stripes! So pretty!
Here’s the project I think is awesome:
http://www.centsationalgirl.com/2013/05/textured-panel-dresser-makeover/
Wow. Table looks great. It’s nice that you choose bright colors 🙂