I am a slave to my Minty Kiss by Victoria’s Secret lip gloss. Good thing I have this awesome DIY Peppermint Cocoa Lip Balm recipe so that I can make it myself. Keep reading and find out how you can make some too.

Let me just take a moment to stop and say one word very loudly: YUM! I. Love. This lip balm. Packed with only natural ingredients {none of that Polyethylene Terephthalate nonsense in the Vicky’s lip gloss}, this balm does the trick when it comes to actually moisturizing my still Boston-winter-dry lips.
So why else should you give this luscious lip balm a try? At $1.10 an ounce {or less, if you’re more patient than I am and purchase your ingredients in bulk online}, this stuff is cheap without feeling cheap.
Compare that to paying upwards of $9 a tube for only half an ounce at Victoria’s Secret, only to leave your lips feeling sticky and dry when the gloss wears off!
HOW TO MAKE PEPPERMINT COCOA LIPBALM
First, gather your ingredients:

I also used a few splashes of peppermint essential oil in this because half–no, all–of what was so addicting about the Minty Kiss gloss was the Minty part. Who doesn’t like that little tingle on your lips??
In case you don’t, however, there’s no reason you couldn’t put another essential oil in this–lavender or perhaps vanilla.
As for specific measurements of each ingredient, that will depend on how much mix you want to make and how big your lip balm containers are. It’s really more of an art than a science. I had three 1oz containers, so to make things easy I used a 1:1:1 ratio of beeswax to cocoa butter to coconut oil.
Specifically, I used one ounce of each ingredient plus two capsules of Vitamin E and peppermint oil to taste–er–smell. All of these ingredients can be purchased online {see affiliate product links above!} or in a natural health store.
Please note that using a 1:1:1 ratio will produce a stiff balm, one that would be excellent in a chapstick tube but not necessarily in a lip balm tub. If you want a softer balm, add more coconut oil to the mix {i.e. more like a 1:1:2 ratio}.
I prefer stiffer balms, so that’s what I made. If you don’t like the stiffness of your balm, you can always dig it out of the container, re-melt it, and add more coconut oil until the balm is to your desired consistency.
Next, pull out your double boiler! Double boilers are used to cook delicate sauces or melt foods {like chocolate} that can easily burn if they get too hot too quickly. Don’t have a double boiler?
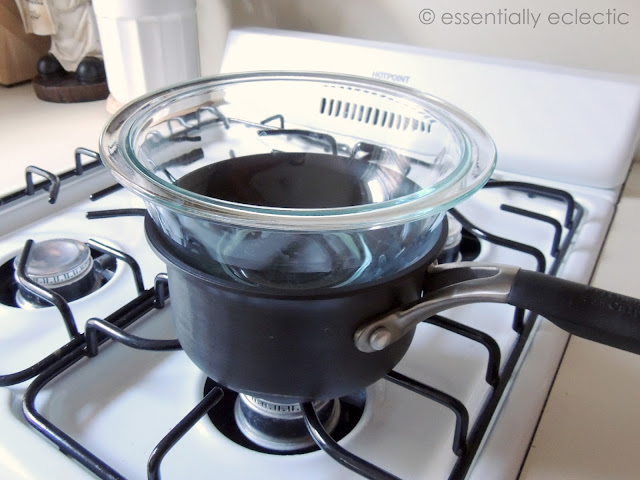
Take a small saucepan and place a metal or glass bowl over it. Voila! Double boiler. Fill the saucepan with water such that the when the water is boiling on super low, it doesn’t touch the bottom of the bowl.
Make sure that steam cannot easily escape from under the bowl, either–you don’t want condensation seeping into your lip balm!
Next, on very low heat melt your ingredients one by one, starting with the beeswax, then the coconut oil. You don’t want to expose cocoa butter to too much heat or it can scorch, so I melted it last just to be safe.
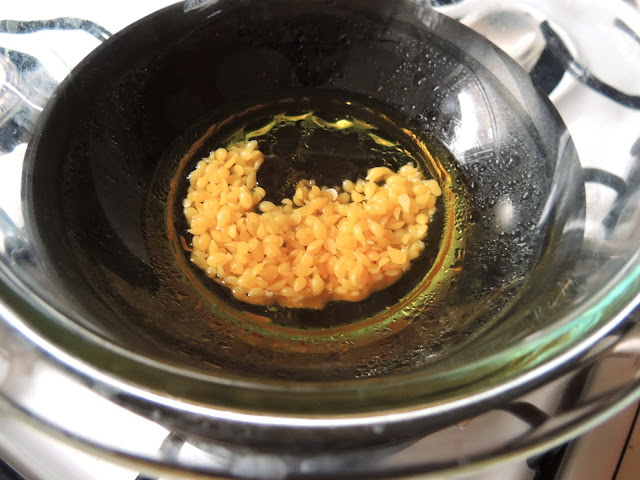
While it was melting, I cut open two capsules of Vitamin E and squeezed the contents out into my mixture. I also put in a few splashes of peppermint essential oil, possibly the equivalent of, say, 20 drops?
I really like peppermint, so this may be too much for you. Add it until you feel your balm is adequately pepperminty. When everything is melted, turn off the heat and pour your beeswax into the container of your choice.
I purchased these 1 oz. glass jars for a dollar each at a local natural health store. I really like glass ones because I can reuse them later:

Carefully pour your balm mixture into your containers and let them cool to room temperature. Resist the temptation to touch them before they’re completely dry if you want that pristine, freshly-poured look! Seriously, step away for an hour if you need to. Then, come back to this:
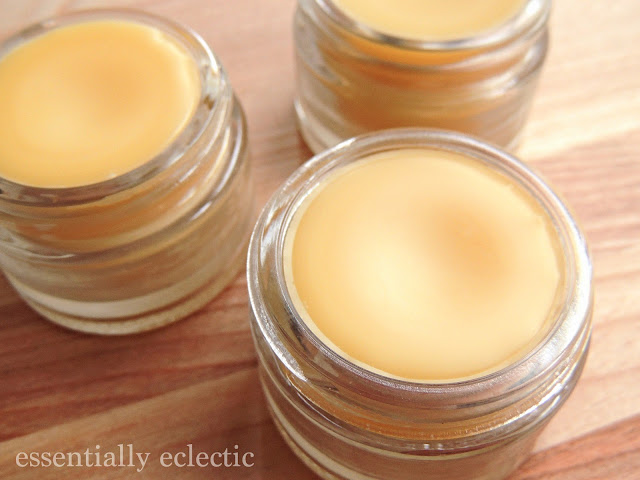
Don’t forget to wipe out your balm mix bowl with a paper towel immediately after you’re done pouring to make cleaning up easier, and never pour leftover balm mix down the drain!
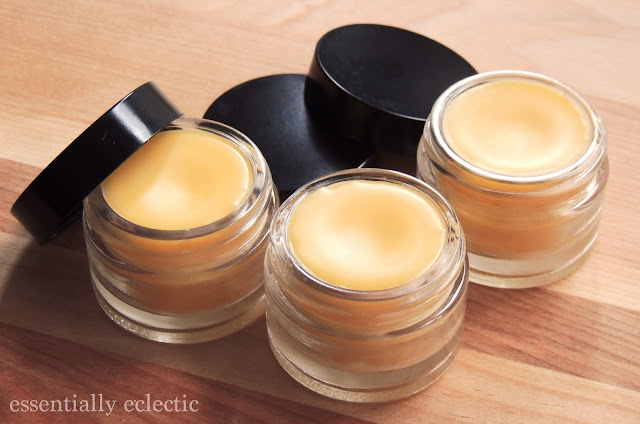
Now, all that’s left to do at this point is enjoy your balms! Don’t these just look lovely??
I would love to hear how things go if you make this lip balm, so feel free to leave me a message on my blog, Essentially Eclectic! If you enjoyed this post, you might also enjoy this post featuring 15 Homemade Sugar Scrub Recipes.


Gabby, I, too, have a lip balm addiction. And now, after reading this post, I have a HOMEMADE lip balm addiction. This post was informative, entertaining, and inspiring. (Which you have a penchant for doing.) Your photos really captured the beauty in each ingredient (who knew you could buy beeswax?!) and made this diy look so, well, do-able! Really, fabulous work.
Thank you, Lauren!! I was hoping this new lip balm would cure my addiction, but I too seemed to have just replaced it with a new one! I am smearing this all over my lips all day at work, to the point where at least three co-workers have said something–it’s kinda sad, lol. But at least this is way less expensive!! As for the beeswax, I do recommend buying it online as it’s usually a lot cheaper, but sometimes you can get it from local beekeepers for not much at all! Where one will find their local beekeeper I cannot say. I’m not sure we have beekeepers in Boston? Anyway, thank you, as always, for your kind words 🙂 xoxo gabby
Gabby,
I have always thought making lip balm was a hard process, but you captured the steps so nicely and it looks relatively easy! I’ve already been to your site and pinned this! I love it and it would make great gifts, so I can’t wait to try it!
Smiles,
Melanie
Hi Melanie!! I would love to hear your thoughts on how they turn out if you give them a try 🙂 There are a lot more complicated (more so in terms of number of ingredients than in terms of process) recipes out there, but I like keeping things just really simple! It’s worth a google, though, if you’re interested in the other recipes–some of them are pretty cool sounding 🙂
These look amazing. I just did a post on coconut oil and keep finding new things to do with it!
Thank you so much!! I LOVE coconut oil–love the way it smells, feels, everything! I’m glad you enjoyed the post! 🙂
This would be a GREAT Christmas idea for the workplace! I work at a school, so there is a big staff. I don’t usually give to everyone, but my list is still long. Plus, it is good for the girls and guys!!
Oh, I forgot to say Thank you;)
Never thought that we can make our own lip balm which safe and healthy by the way.
Hi Diana, what a great blog post home made lip balm easy and probably most important you know what’s in it! thanks Kelly.
I made these and love the I also used Wilton chocolate pro which is a mini melting pot and it works great and you don’t have to worry about it burning !!!!
What a great tip! Thanks so much for sharing, Erin! XO
Your welcome ! It takes a little bit longer to melt but its worth it !
Made this balm yesterday!
came out very thick 🙂 it smells of cocoa butter yet taste like mint. Im going to make again using more coconut oil because its so thick I can barely get any out.. gave the extras to my mom, brother, and two sisters and they love it. Thank you!
I am going to make these for Christmas presents this year, but I wanted to add vanilla to mine also. This is probably a silly question, but what do I use to add vanilla? Do I use lip balm flavoring? Essential oil? Or can I use something simple that I already have like vanilla extract?
I am going to try using the vanilla extract I already have rather than buying vanilla essential oil. I will let you know how it turns out.
OOOh, let me know how that works for you!! 🙂
Awesome thanks! I can’t wait to hear how not goes! I hope it works with the vanilla extract!
I meant to say..Awesome thanks! I can’t wait to hear how that goes! I hope it works with the vanilla extract!..sometimes I don’t like auto correct..
I had to permanently disable autocorrect on my phone! I feel your pain. I will let you know how it turns out. I’m going to try it in the next couple of days.
how did the Gaulle turn out??
how did the vanilla turn out??
I haven’t tried it yet! I’m homeschooling my kids for the first time this year, so I haven’t had a free moment to try, but I will very soon and I’ll make sure to let you know 🙂
I can’t wait to try this! Do you have any recommendations/concerns about other containers used? Plastic round? Thank you!
I am going to try this without the Vitamin E, because I have not found a gluten free Vitamin E capsule.
Try the liquid vitamin e I haven’t checked to see if its gluten free but works way better than trying to cut pills !
This looks amazing! In fact, I will be making these for my family as Christmas gifts. This might be a silly question but when you say 1:1:1 ratio, do you mean 1 cup each? or 1 oz each?
Thank you. Can’t wait to make these 🙂
Hi Liz – this is a guest post so I’m not 100% sure but my *guess* would be that depending on how much you need to make (how many gifts you plan on giving) just keep the ration 1:1:1. So, if you use a half cup, use a half cup of each. If you need to make a bigger batch to split up then do a cup of each ingredient. Does that make sense?? 🙂
That makes perfect sense. Thank you so, so much! This is very helpful 🙂
Hi there,
I have just made these lip balms for christmas gifts (2014)…AMAZING! Super easy! I quadrupled the mixture from 1:2:1 (i.e. Melting in order of: 4oz Beeswax, 8oz Coconut oil and 4oz Cacao Butter). I was surprised at how long the coconut oil took to melt after the beeswax was melting and how little the cacao butter took to melt…I added approx 45 drops of doTerra peppermint oil for the minty taste :-). I will definitely be making this lip balm again with a variety of scents. Thanks for an awesome easy recipe!!
Hello! I was wondering which vitamin capsules you recommend using?
I’m hoping to try this recipe and I don’t want to buy a wrong one
I have made this Chapstick on 4 occasions. At first they were perfect but something in them starts to crystallize after a week or so. I have adjusted the proportions of oil and butters in each batch. Does this happen to you? Any advice on the matter would be much appreciated.
Thanks
Ashleigh
Did you add the vitamin E? Vitamin E acts like a preservative and keeps it stable longer.
Yes. The vitamin E was added while melting the beeswax down. Hope this helps. 🙂
This may be a dumb question but I’m going to ask anyway. How do you get the balm transferred from the double boiler to the small containers without it being a mess? I’m not graceful, want to try this but foresee it all over my counter with none in the jars!
Not a dumb question at all. I haven’t made it before (this was a guest post) but I would suggest maybe spooning it into each glass jar. Or if you have small funnel, you can try using that. Those would be my first 2 tries if I were making it. I hope this helps. XO
It will mean either finding somewhere locally, or ordering (I bought on Amazon), so would have to wait a bit, but you can use little disposable plastic Pipettes. http://www.amazon.com/Plastic-Transfer-Pipettes-Gradulated-Pack/dp/B005IQTSE0/ They work great!
Not sure if or where you would find them locally tho.
Just made this and poured in 2 oz shooter mason jars.. So cute! It seems thin I used a 1:1:2: ratio.
Would you add more beeswax to thicken?
Thanks for the post!!
Hey Mary! This was a guest post so I’m not too sure. The blogger posted it on her own site and there are lots of comments, some with questions, and Gabby is pretty good at responding and answering them. I hope you will be able to find some help there. (since I got nothing. lol) XO
Hi! I found this recipe on Pinterest and I just loved it!!! My lips thank you for it. I added almond extract to go with the cocoa smell and then I just went cray and tried a bunch of different ones… Every body in my entourage is receiving some for Christmas this year! Thank you so much for sharing
Yay!! So happy to hear that! XO
Hi Diana I found this recipe very useful, my family loved it much and now no one will buy any lipbalm in supermarket. Thanks to you my dear ??
So glad to hear it, Sarah! XO
It’s 2020 and I’m still making this recipe over and over. I gifted them one year and my sis-in-law still asks me for more every year. It’s definitely a family favorite! I use the peppermint for a mint-chocolate flavor, and pour them into tubes. The texture is perfect and makes my lips so soft. Thank you for a wonderful recipe!
I am so happy to hear this! Thank you so much for letting me know. 🙂 XOXO