Jamie from the Backless Shirt blog is here to share her tutorial on Industrial Tiered Trays. You are not going to want to miss THIS! Her idea is genius! Please go visit her blog and show her some love.
i am a fan of tiered trays. i especially like them for the efficiency and space savings they offer. which is why i have been happy to see so many fun tutorials on how to make them.
after taking a look at several tutorials, i started thinking about how i could build one that would suit my style: simple, modern, functional.
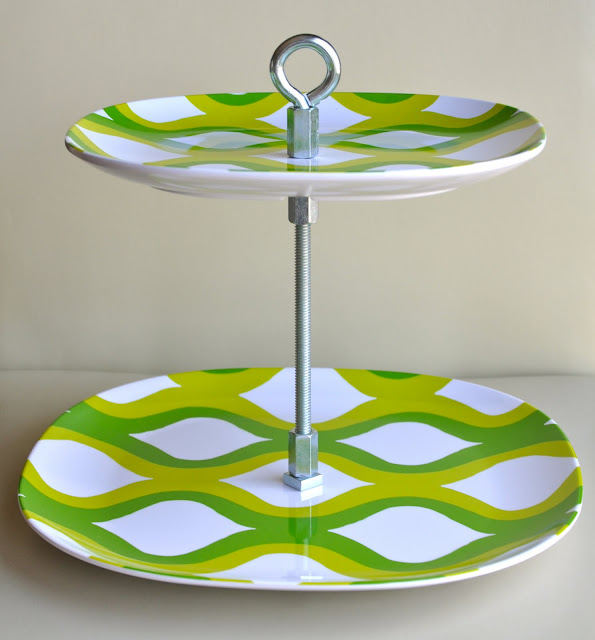
i took a quick stroll through the nuts and bolts aisle at Home Depot to see what i could put together. it’s not for everyone; i love it! and here’s how to make your own!
here’s what you’ll need for a two-plate serving tray:
- 2 melamine plates (of different sizes)
- 7 inch length of all thread (the center post) (5/16″)
- 1 eye bolt (for the handle on top) (5/16″)
- 3 nuts (5/16″) i chose square nuts instead of hex
- 3 coupling nut (couplers) (5/16″ by 7/8″)
- drill
- hack saw
- pliers
- adhesive rubber bumpers (for bottom)
i don’t show an eye bolt in these pics, sorry. |
- first, mark the center of both plates. to do this, apply a few layers of blue painter’s tape to the approximate center on the top and the bottom.
- measure, mark, and drill with a multi-purpose or wood bit. we (hubby and i) determined drilling from the top leaves a cleaner hole on top. drill holes in both plates.
| your mark should be the center of the plate. this one was off-set. |
- eye bolts come in specific lengths, all which are too long for this project. use a hack saw to cut it to length. you’ll want the threads to be about 1/2 the length of your coupler.
- determine the distance you want between your plates. add half the length of your coupler and the height of your nut (remember to account for the thickness of your plate). then saw the all thread to the proper length. if you’re off by a fraction of an inch, no big deal…this measurement is forgiving.
- damage the threads on about an eighth of an inch at the end of your all thread by carefully tapping with a hammer. this will keep the bottom nut from unscrewing. you could also add a drop or two of glue to keep them secure.
| this is my husband sawing the all thread; same procedure to use on the eye bolt. |
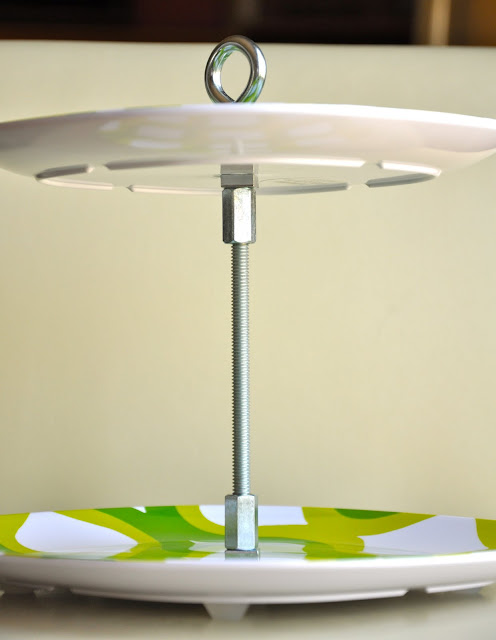 |
| in this order from the bottom: nut, plate, nut, coupler, coupler, nut, plate, coupler, eye bolt |
add rubber grips to the bottom so the tray will be level. i guess they call them ‘vinyl bumpers’. these are nice and thick and adhesive. they add stability to the tray as well. i have been carefully hand washing and drying these trays to keep them looking beautiful.


XOXO
Diana
www.thegirlcreative.com




This is a great idea, thanks for sharing!
I love this. I made one with candlesticks and trays, but I really like the metal in this!
Oh I love this idea!! I have an old set that my grandmother had, but I hate using them as I’m worried they’ll get damaged! This is an awesome idea! Imagine them loaded with cupcakes! Yum!
Wow a very unique color combination!!!
May I ask where you got the plates for this project?(: