Hello creative ladies! I’m back again to share another awesome blogger tip and share some free stuff! The last couple of months, I’ve been spilling all of my little blogger secrets from how to create a projects directory on blogger, to how to image map. Today I’m here to show you one more trick – how to create a Photoshop Image Template for super speedy blogging.
I’m sure some of you fellow bloggers out there are also work full-time like me. I work a full time job and have a pretty busy life outside of the office. I’m often asked how I find the time to be a blogger on top of all this? Well, some days it’s hard, but I’ve found a few tricks that keep me sane. And one of these tricks is Photoshop Image Templates.
So today I’m here to show you how to make some of your very own, and I’m even giving my five favorite templates away to get you started.
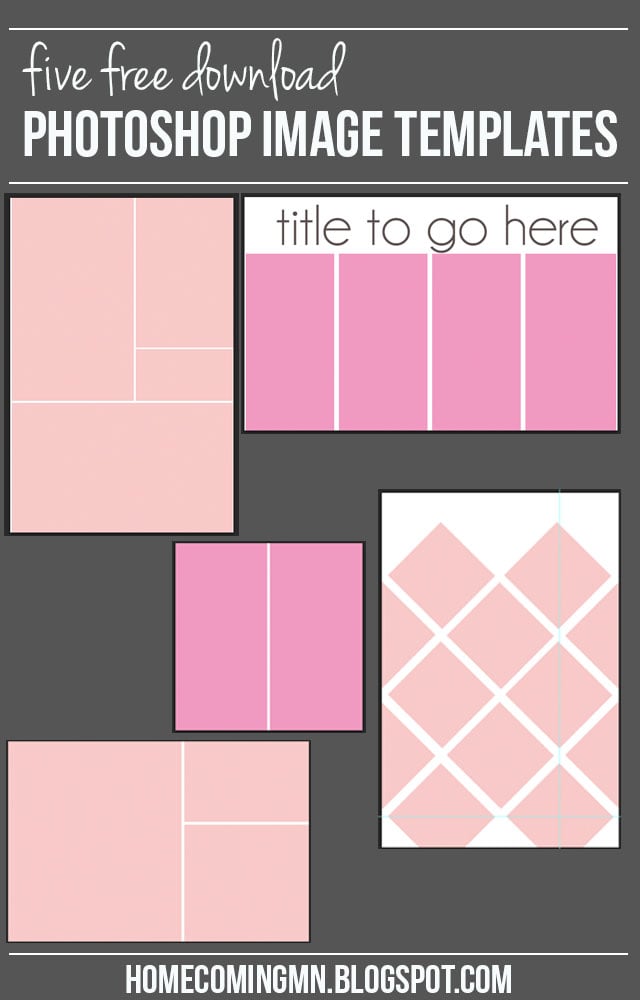
I decided to start creating a few image templates in photoshop to save myself time when putting together images for my blog posts. By having these templates readily available, I’m able to very quickly copy and paste my blog images into the template for a quick collage. When I first started blogging, I would attempt to put together my photo collages every.single.time and the time to produce a good post very quickly got out of control.
In comes photoshop to the rescue. So, if it’s not clear already, this tutorial is for those of you who have photoshop. If you don’t, I’m sorry! I love photoshop and have no idea how I ever lived without it.
So let’s get to it.
How to Create a Photo Collage Template using Photoshop
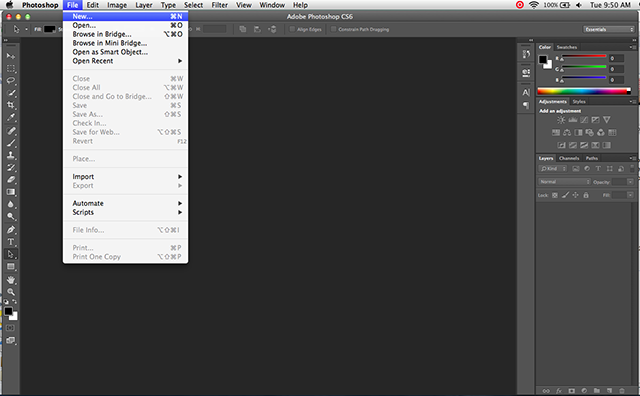
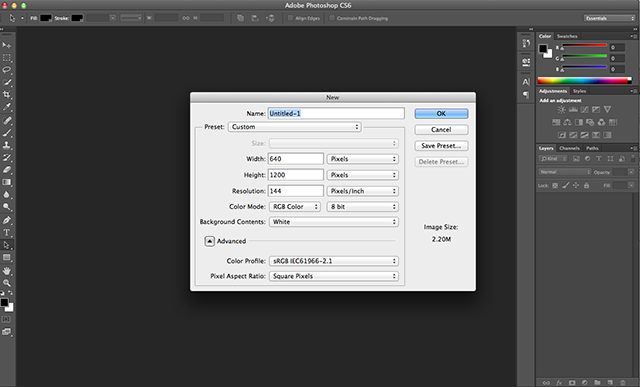
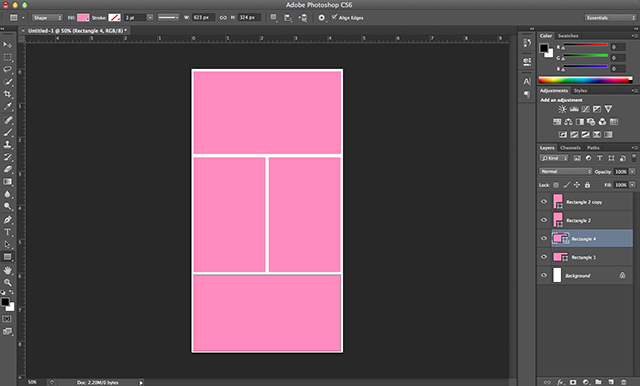
Step 1: Open a new document in photoshop at the size you’d like your collage to be.
I always use 640 pixels for the width of photos on my blog, so I built this example at 640 x 1200.
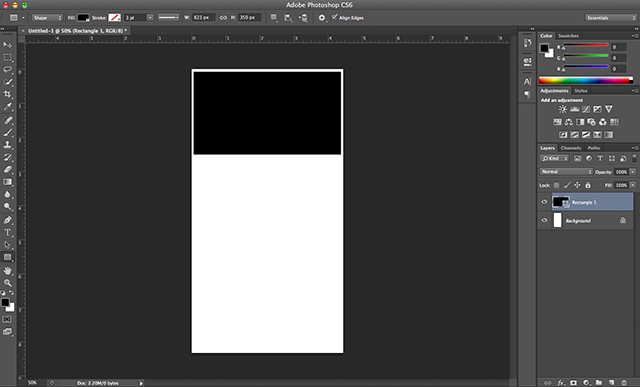
Step 2: Using your rectangle tool, start building your collage. Note: I chose to use rectangles in this collage example, but this tutorial will work for any shape you’d like!
Optional Step: I like to turn my rectangles pink so they’re easy to spot in my right hand layers panel, as well as so I can easily tell if my photo doesn’t fit perfectly. A sliver of pink sneaking out from behind a photo is much easier to spot than black. (That, and pink is prettier!)
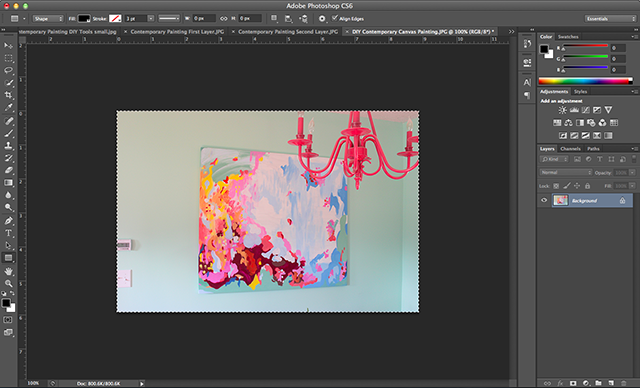
Step 3: Once you have your collage built with your rectangle (or other shape) tool, open your photos that you’d like to put into the collage. I typically resize my images before copy and pasting into the collage, so they’re similar sizing and the image stays clear. Copy your image.
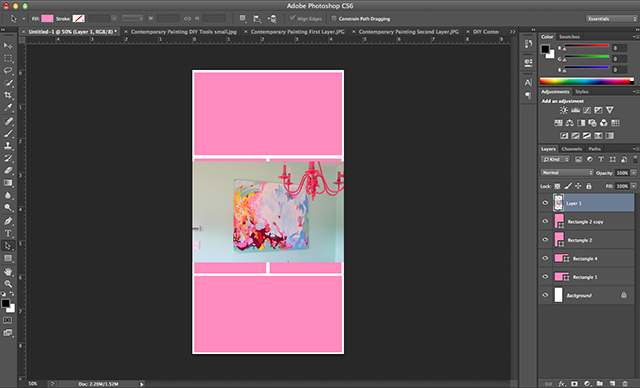
Then paste onto your collage.
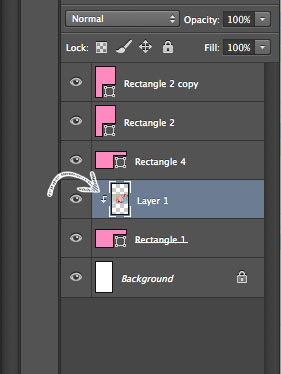
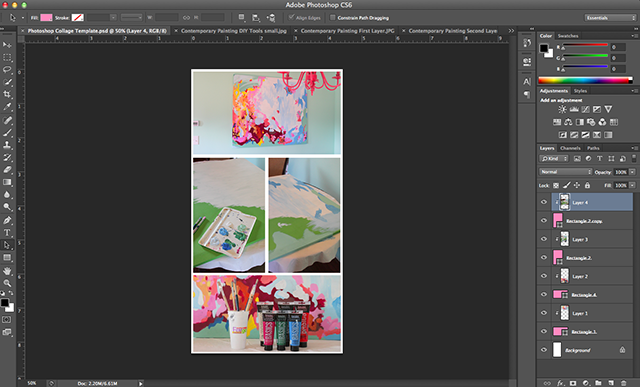
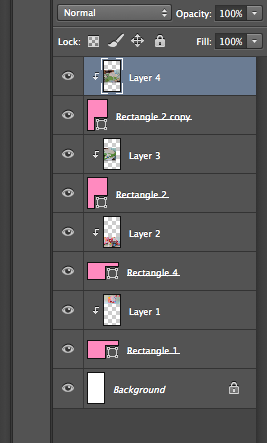
Step 4: Since I wanted this photo in the top pink box (labeled “Rectangle 1” in my layers panel), I first moved the image “layer” to right above my “Rectangle 1” layer. Then, to move the photo “into” the rectangle, hover over the line in-between the two layers, then hold down your control button and click. An arrow pointing down should appear next to your image layer like the below photo.
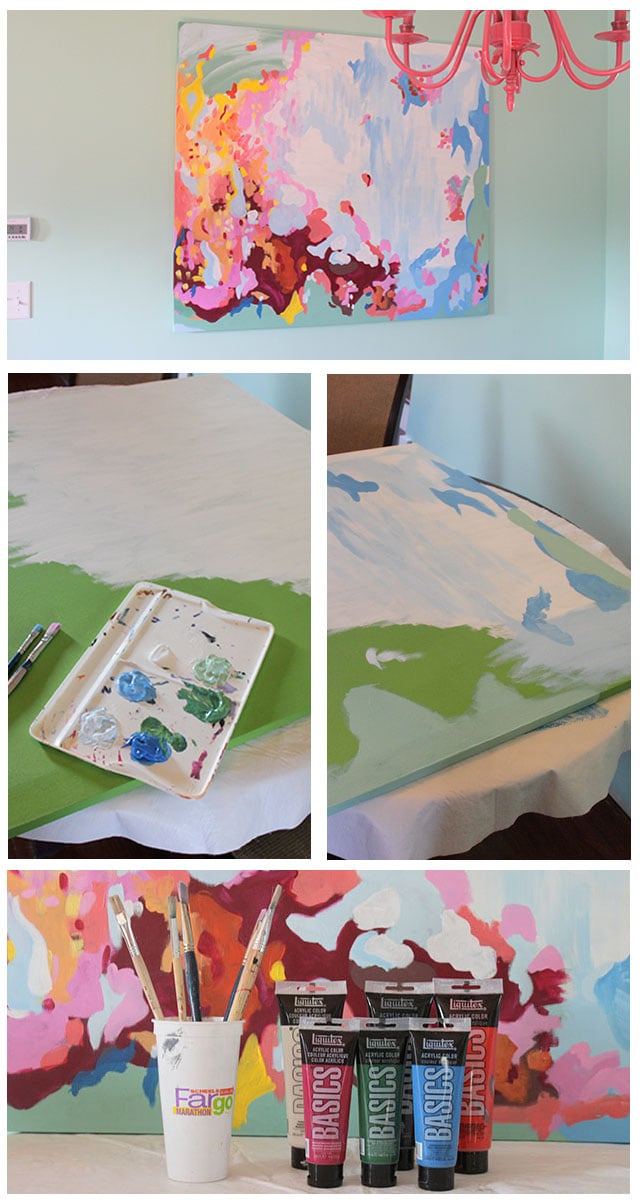
For the purposes of the tutorial, I randomly chose a few photos from a painting I did last month. The collage arrangement and size isn’t perfect for showcasing the painting, but for the purposes of the tutorial it works.
Here’s what my collage looks like after copying and pasting four images in place, then inserting them “in” each of my four rectangles in the collage.
This is what your layer panel should look like.
And this is what the actual collage looks like once I saved the file as a jpg!
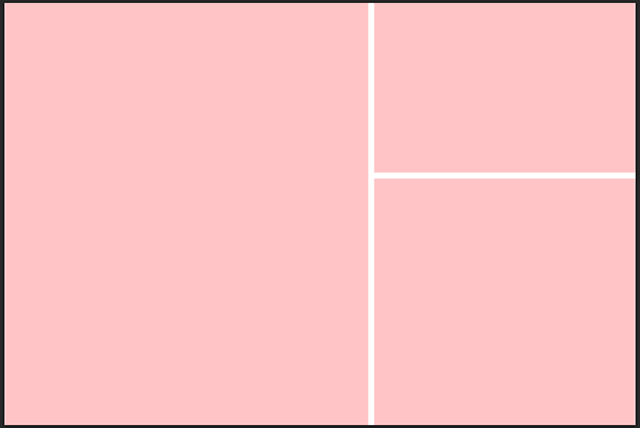
Since teaching myself how to make collage image templates in photoshop, I’ve created probably 50+ templates that I use in just about every single post I do. And today I’m sharing my five favorite templates with all of you!
I’m sharing a good combination of simple templates for a more traditional collage, to some more exciting and fun templates for a little bit of variety. Download all five by clicking on the download button below!
I hope the tutorial was helpful and that I can help all you photoshop using bloggers out there to shave some time off of your posts so you have more time to go out and enjoy life.
Leave a comment if you have any questions. I’m happy to help!
Want to learn more about me or see my DIY Projects? Swing on by Home Coming and check us out!




LOVE these – I needed some new one. I was really starting to get bored with my current ones I have been using for years & I never just make new ones. I don’t know why because it’s easy – I just always resort to the old ones. So……. Thank you!!!!!!!!!!!!!!
I’m so happy you like them!! Thanks for the kind words!
Great , thank you ! I think now I’ll finally start using photoshop 🙂 it looks so much better than just plain simple pictures 🙂
Thanks Joanna! You’ll love photoshop. 🙂
I’m just learning Photoshop and this is VERY helpful. Thanks for the tutorial and a few templates to get me started…wish me luck!
I’m so glad this is helpful. And good luck!
I love these! I’m a travel blogger so photos are essential! I was looking for tips and tricks and found you on pinterest. Definitely subscribing. Thanks for being awesome.
You are very sweet! XO
Hi there, I am clicking on the “click here to keep reading” button but I am getting linked to a post about St. Patricks day baking… Anyway to see the full post?
Thanks
Thanks so much for the heads up. It’s fixed now. 🙂
Amazing tips! It help me a lot! Thanks you!
Hmmm…you said to click on the ctrl button to clip the photo…but on my PC I click the alt button!
Heym I am trying to download your angled square template and it wont work it just kind of sits there. I have been trying to create one like this for ages but keep messing it up Many thanks