Hi there! It’s Stef, from girl. Inspired. Today, I wanted to show you how to take your child’s birthday party to the next level by making some of the cutest party hats you’ve ever seen. Remember the “straw flare” that we made a while back? Well, I’ve made a little firetruck party hat to go along with the firetruck theme. These are so simple, you’re not even going to believe it!
First, you’re going to cover a plain party hat with some nice patterned cardstock. To see how to do this in more detail, you can visit my party hat how-to, here.
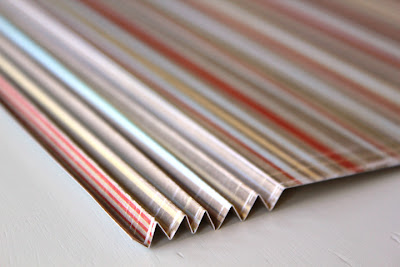
Next, we’re going to make an accordian circle and hot glue it on the center front of the hat. To make the circle, I use three square pieces of patterned cardstock. Score the squares at even intervals all the way across. Score once in the center perpendicular to the other lines. Then, fold the square back and forth on your scored lines. Once the square is folded up accordian style, fold it once more along that perpendicular score line. Repeat with all three squares.
Finally, arrange the three “fans” in a circle with the folds to the center. Hot glue at each opening to form one larger accordian circle.
Once you have hot glued the accordian circle onto the party hat, add additional embellishments to finish it. I used a fire truck that I cut using my Cricut.
With all the die-cut machines out there, your options are endless. You could certainly use a store bought diecut, a monogram, a bow…whatever you want! And, depending on the size of the squares and the width of the scored intervals, your finished circle can really turn out in a variety of ways.
With three girls, we don’t get a chance to do a lot of firetruck hats, but I promise your little one will look super cute with any handmade party hat!
Happy crafting!!







Due to the amount of content that is used without permission and proper credit, I am no longer allowing a full RSS feed. I value each and every reader so I hope you will click through and come visit!
XOXO
Diana
www.thegirlcreative.com




Such a cute tutorial. Im planning my daughters 2nd birthday and I may just have to make these 🙂
I’ve always wanted to make these. You did a great job, so cute!
Great project and that little girl is a cutie!
Awesome post and lovely work. Thanks for sharing!