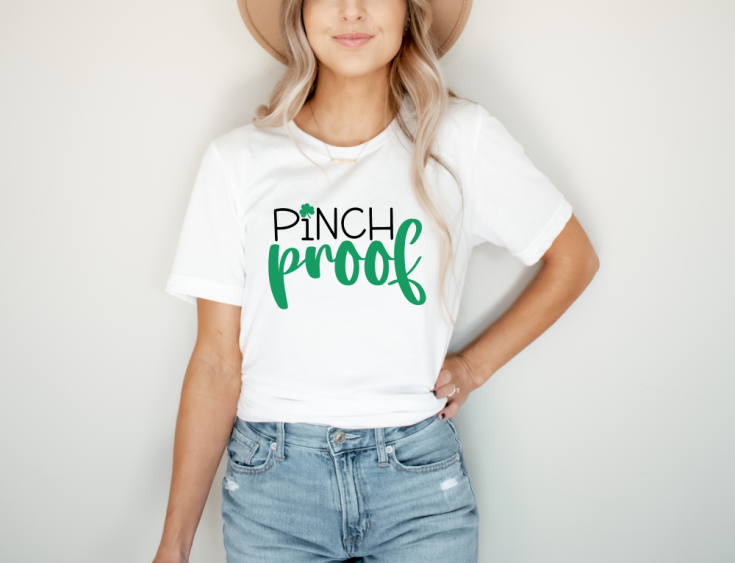
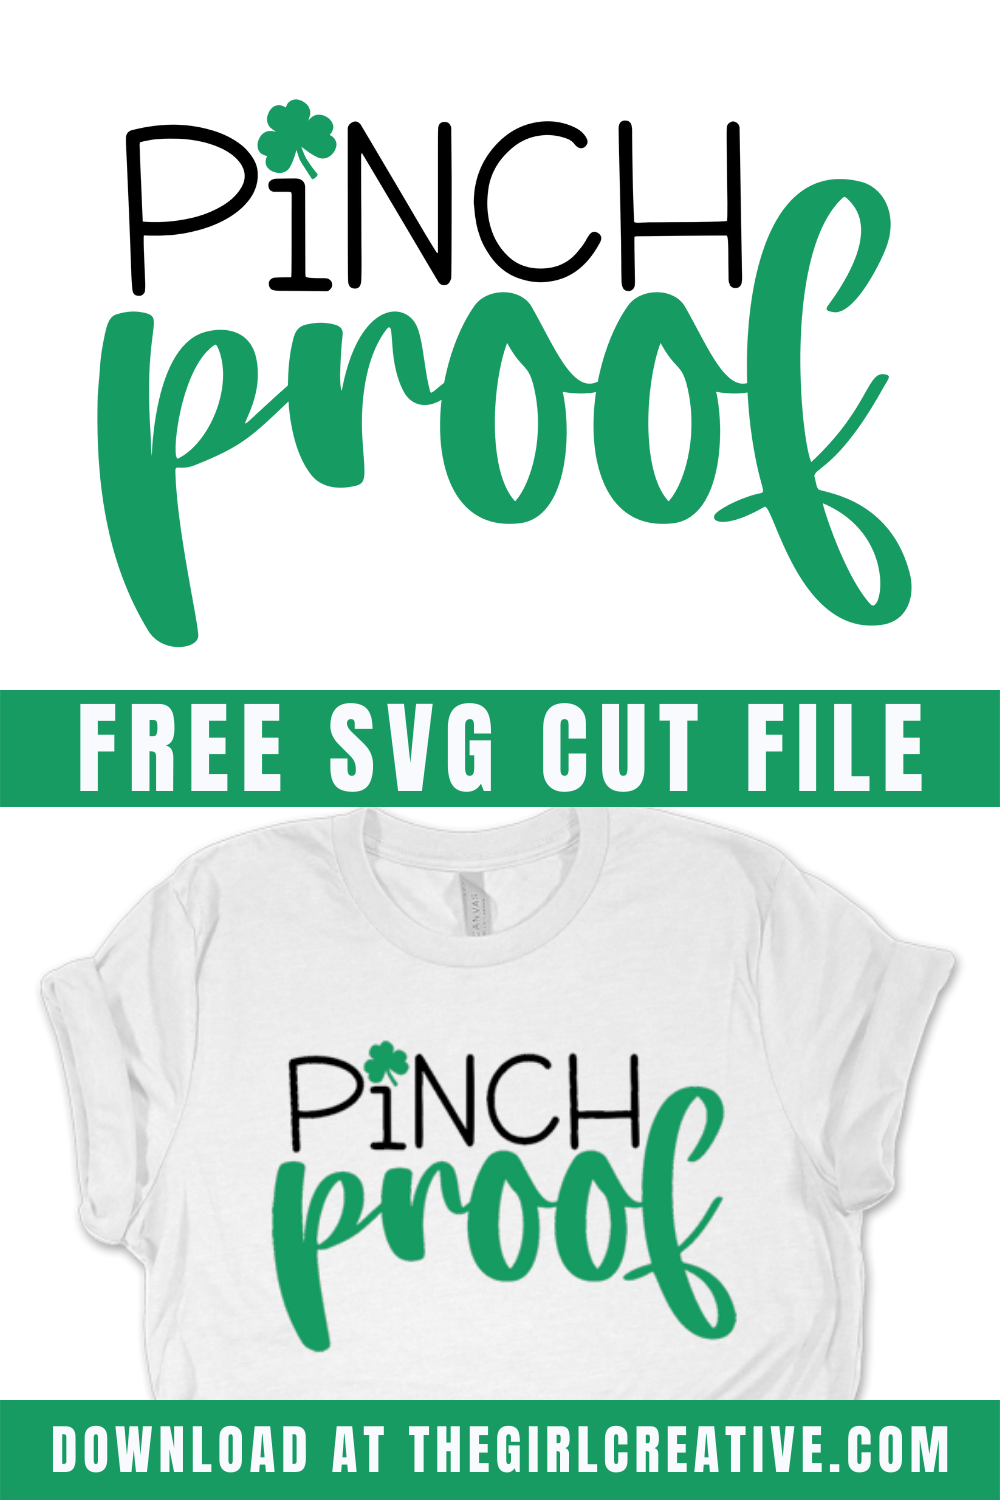
St. Patrick’s Day is here and it’s time to celebrate! Grab this Free Pinch Proof SVG, your Silhouette Cameo and get to work. Make shirts, tumblers, stickers and more!
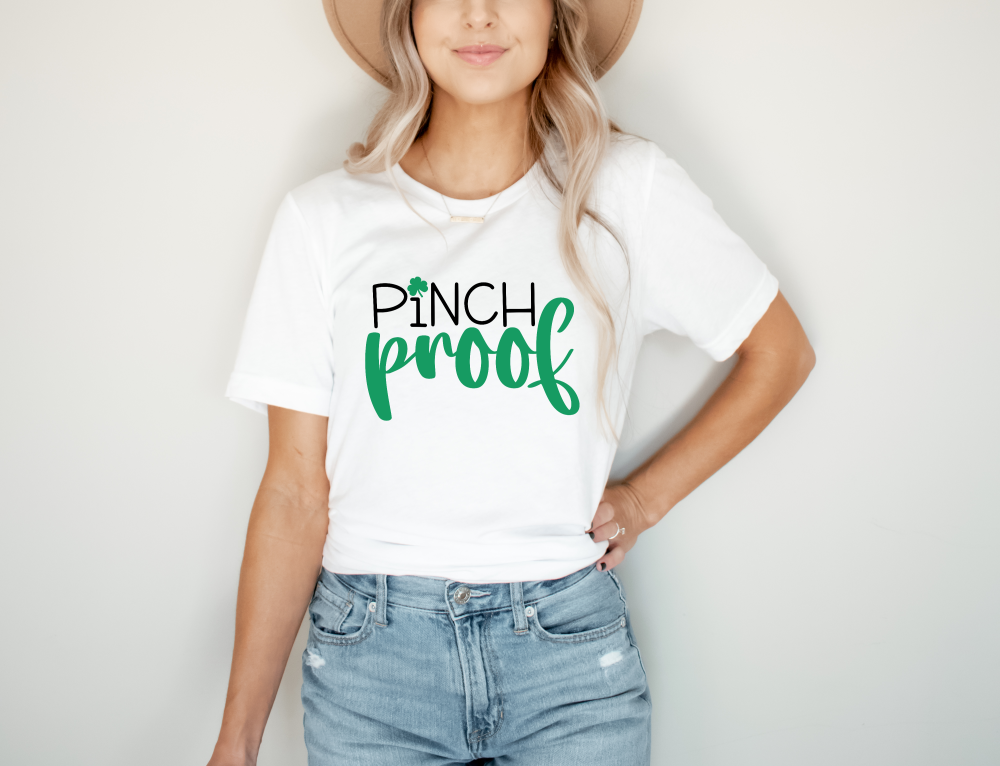
Although St. Patrick’s Day is March 17, I see no reason why we can’t celebrate all month long. This free St. Patrick’s Day SVG download comes with the SVG file, of course, along with a PNG with a transparent background.
Transparent PNGs are perfect for printing. I especially love to use them to create stickers. Side note: PNG Files that you download from here are usually very big and will need to be resized down prior to printing.
FREE COMMERCIAL USE FONTS
When creating new designs I always make sure to use fonts that come with a commercial use license. This allows me to sell my designs if I choose to.
My favorite sites to download fonts are Creative Fabrica and FontBundles.net. They offer thousands of fonts and an awesome assortment of FREE FONTS that come with a commercial use license.
FREE PINCH PROOF SVG
The fonts I used in this Pinch Proof SVG for St. Patrick’s Day is Sunset Moments and Hayleigh, both available at Fontbundles.net.

As seen in:
Latest in our Shop
Latest Cricut Projects
See All >
No posts
No posts
If you want to make this Pinch Proof shirt for yourself, here are some easy to follow instructions as well as a supply list on what you’ll need before you get going.
PINCH PROOF SHIRT
To make this Pinch Proof Shirt for St. Patrick’s Day you’ll need a few supplies. If you’re a long time Silhouette Cameo user, you will probably have many of these items already in your craft stash.
PINCH PROOF SHIRT SUPPLY LIST
- Tshirt Blank
- Green and Black HTV (Heat Transfer Vinyl)
- Heat Press or Household Iron
- Weeding Tools
- Silhouette Cameo (Portrait will work if you are making a smaller design)
- Cutting Mat
Now that you have your supplies, you’re ready to make your own Pinch Proof Shirt.
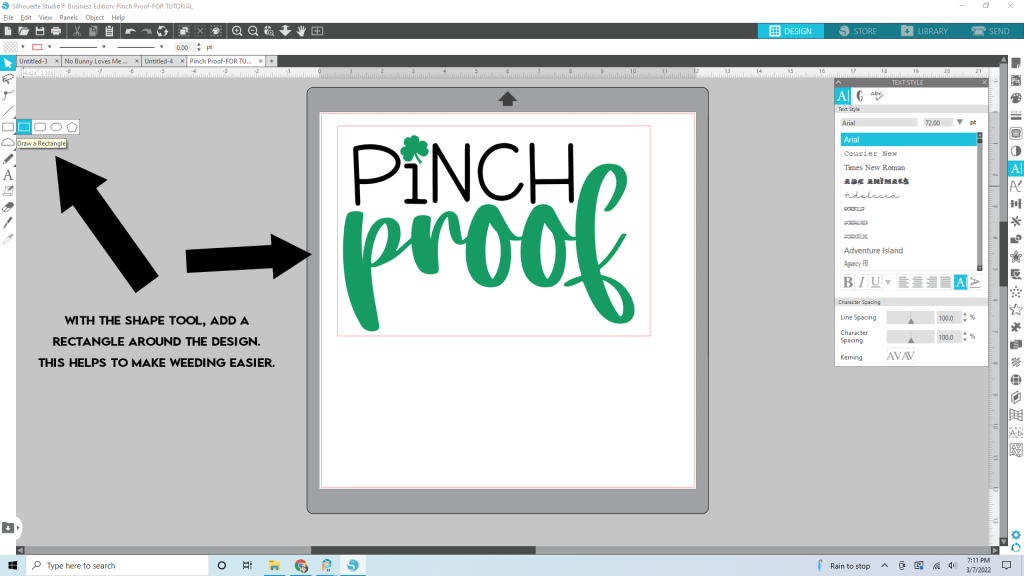
Step One: Upload your design into the Silhouette Studio software. You will need designer edition or higher to upload an SVG. Once it’s uploaded, add a rectangle around the design. This helps to keep your weeding area manageable.
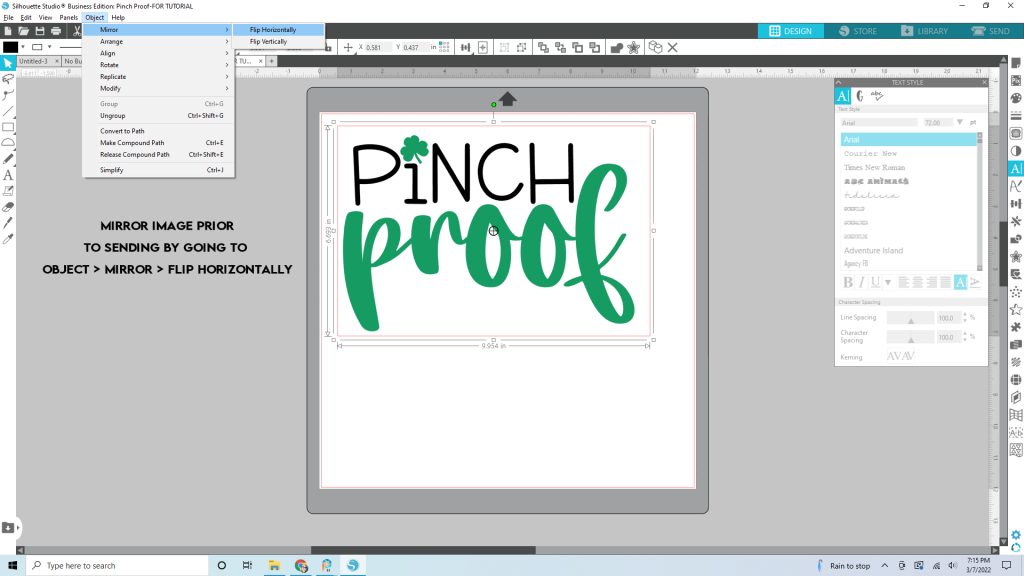
Step Two: Mirror your design. When using Heat Transfer Vinyl (HTV), you will need to mirror your design prior to cutting it out. To mirror an image in Silhouette Studio go to OBJECT > MIRROR > MIRROR HORIZONTALLY
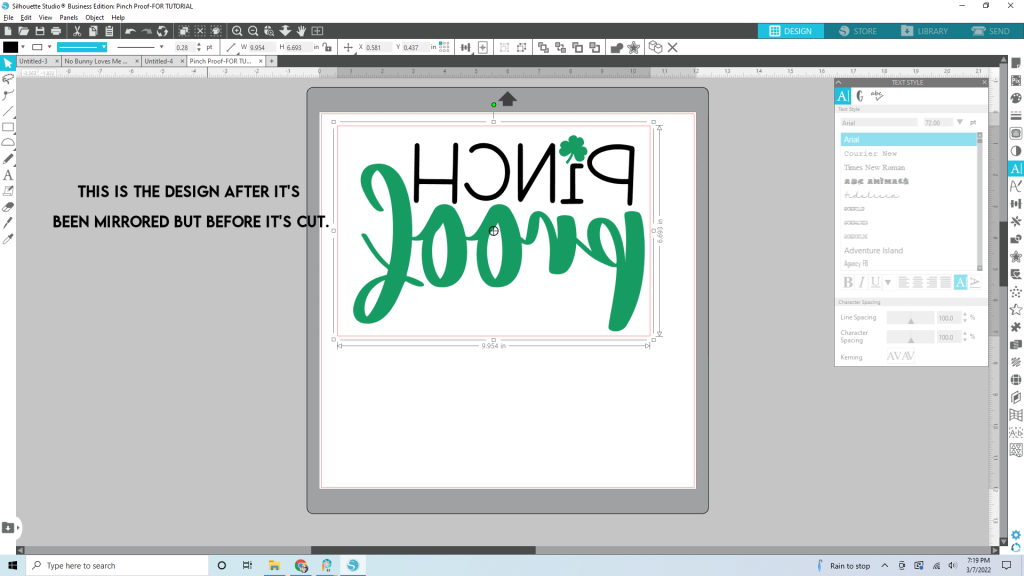
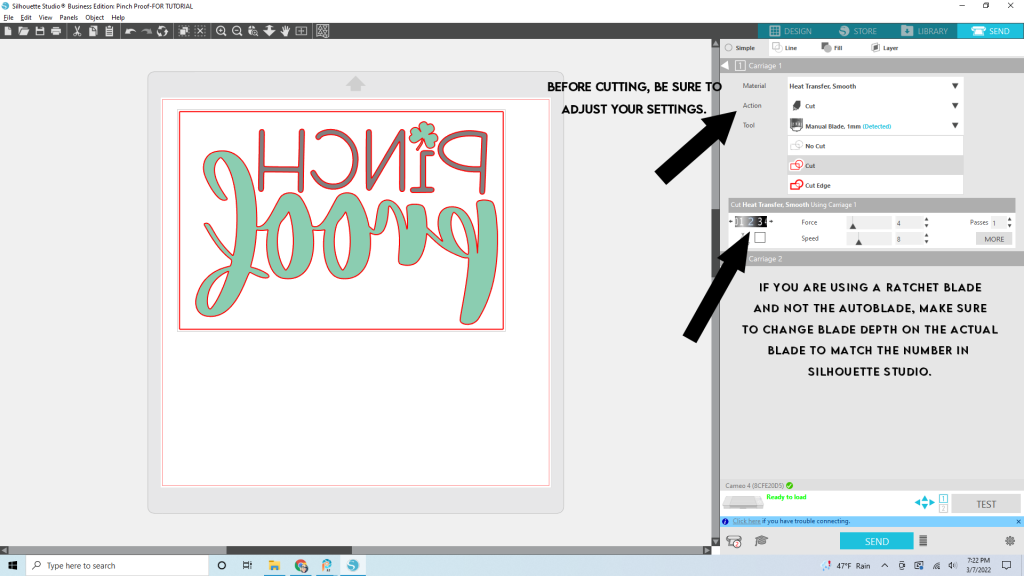
Step Three – Part 1: Go to the “SEND” panel and adjust your settings. Make sure to adjust your material, action and tool. If you are only using one color for the whole design, you will want to be on the “SIMPLE” tab to adjust your settings. If you are cutting in multiple colors like the Pinch Proof design shows, then continue onto Step Three – Part 2.
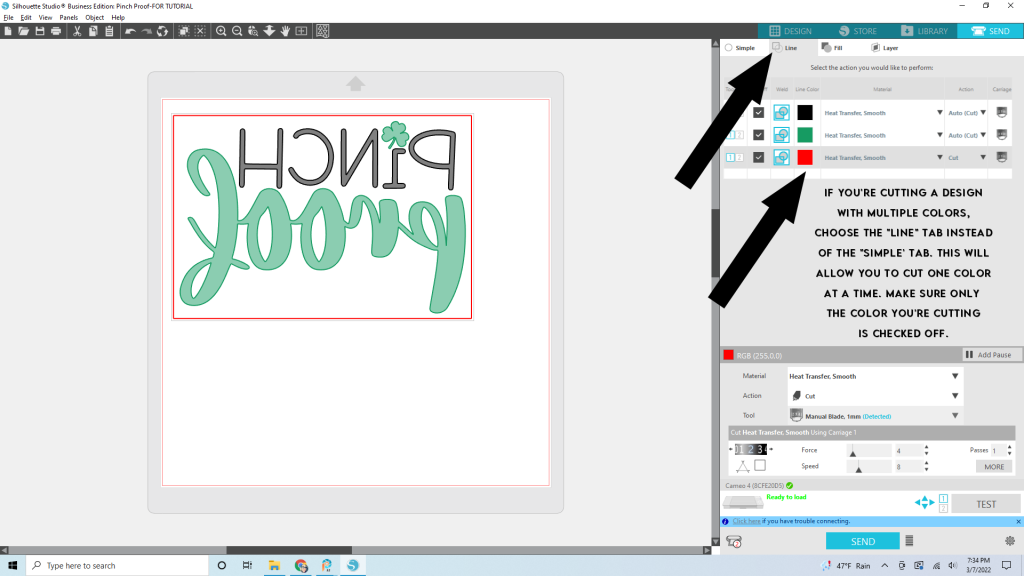
Step Three – Part 2: If you’re using more than one color for your design you will want to be on the “LINE” tab. Make sure only the color you’re cutting is checked off.
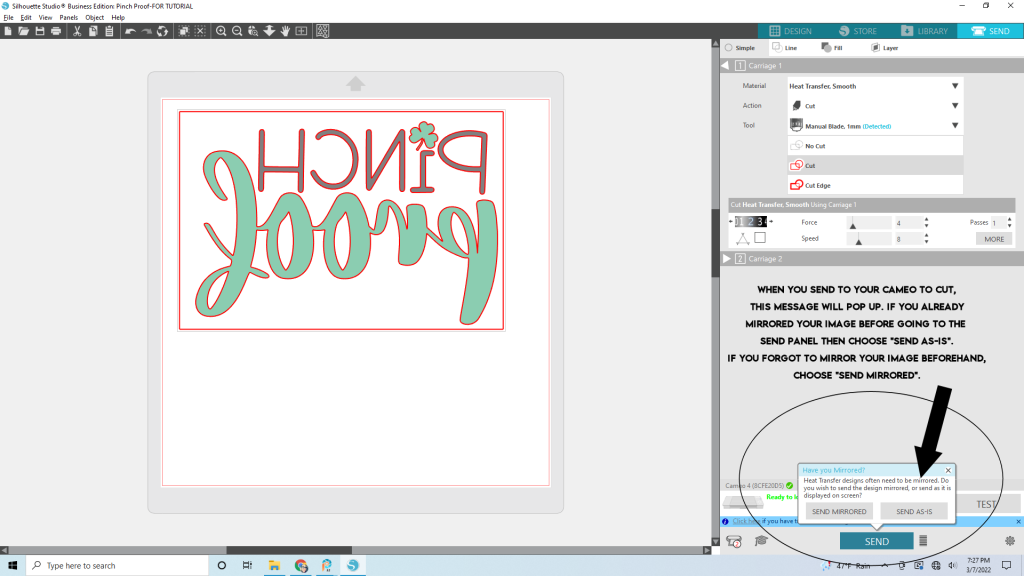
Step Four: Once your material is loaded to your cutting mat, it’s time to cut. When you click “SEND”, little message will pop up asking you if your want to “send mirrored” or “send as-is”. If you already mirrored your design in the design panel, then choose “send as-is”. If you forgot to do that, go ahead and choose “send mirrored”.
Step Five: Once your design is cut, go ahead and weed the excess material away from the design leaving you with just your Pinch Proof design on a clear carrier sheet.
For this part you are going to lay your design on your tshirt blank with the clear carrier sheet on top. Next, follow package instructions for pressing.
HOW TO MAKE SURE MY DESIGN IS CENTERED ON MY SHIRT
You may be wondering how to make sure your design is centered on the shirt before pressing. Here’s an easy little trick. Take your shirt and fold it in half long ways with the back of the shirt folded against itself. Now, take your iron or heat press and press the fold on the neck of the shirt.
Lay your shirt out flat and take your design and fold in half evenly and crease the very top of the carrier sheet only. Do NOT crease the whole design. Now line up the center point on the shirt to the center point on the design. Be sure to leave enough room between the neck of the shirt and the top of the design.
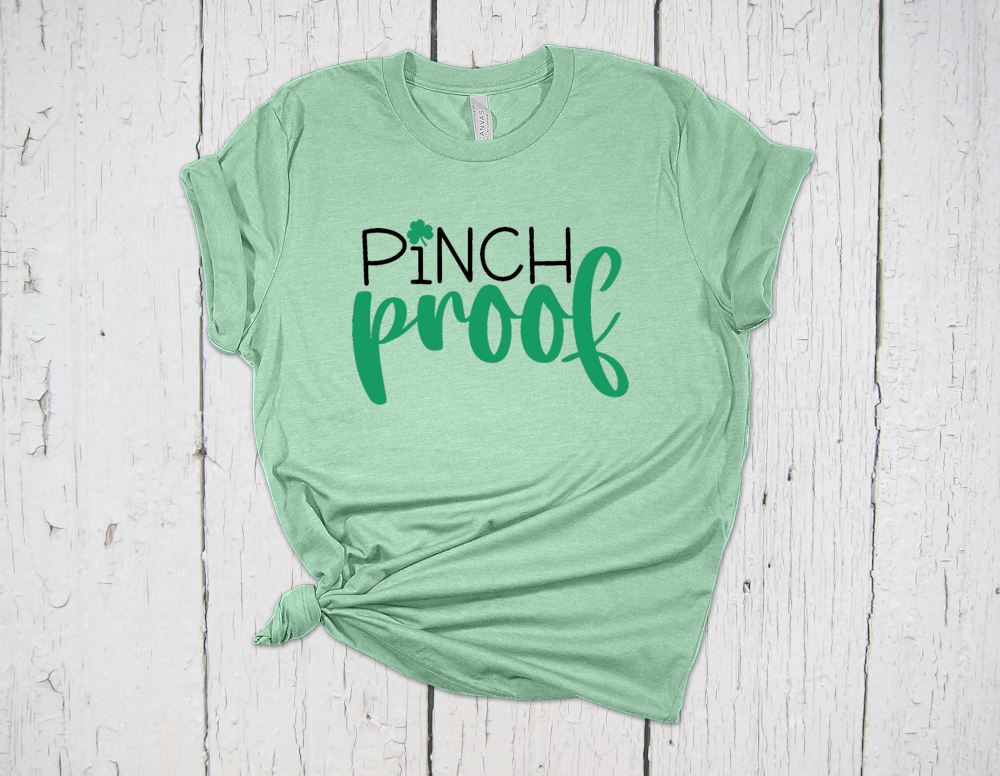
This “Pinch Proof” download comes with an SVG and a transparent PNG. The SVG is on a 12×12 artboard but you can size it up or down to your liking in Silhouette Studio or Cricut Design Space. The PNG is 300 dpi which is perfect for printing if you don’t have an electronic cutting machine.
If you have Silhouette Studio basic edition, you will need a DXF file. This file will be sent to you upon request.
IMPORTANT DOWNLOAD INFORMATION
To get your FREE “Pinch Proof” St. Patrick’s Day SVG you will need to enter your information in the form below. Once you do that, check your inbox. Your free files will be sent to you via email. They will be in a zipped folder that you’ll need to extract. It is strongly recommended that you download your files from a laptop or desktop computer.
FREE SVG CUT FILES FOR ST. PATRICK’S DAY PROJECTS
FREE ST. PATRICK'S DAY CUT FILES FOR SILHOUETTE AND CRICUT
Create shirts, mugs, signs, tote bags, tumblers, water bottles and more with these FREE St. Patrick's Day SVG Cut Files

