Hi everyone! My name is Kalyn and I am from And I Thought I Loved You Then. Thank you so much Diana for allowing me to come over and share my crafts! This week I am showing you how to make a Thanksgiving countdown. I saw this in the Pottery Barn catalog and about fell over when I saw how expensive it was, $70, I knew I could make one for a lot less. Mine might not be as perfect but I have memories of making it with Eliza, and a few extra dollars in the bank.
Here are your supplies this week-
Felt- I did 3 different colors for the tree, a yard for the trunk, a yard for the top, and a half of yard for the grass.
Felt sheets-I used these to cut the leaves
Vinyl-For the numbers, you could use any sticker you want
Fabric-For the words
Heat and Bond-To adhere the words
Sticky Back Velcro-For the leaves
Scissors
Hot glue
Marker
Leaves
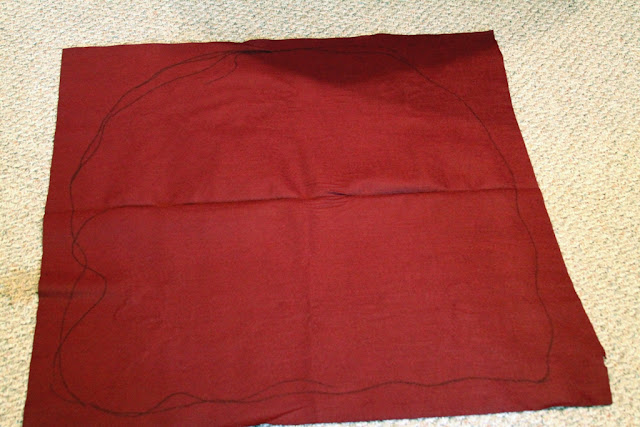
Start off by drawing out your grass. I used a black marker and as you can see it took me a few attempts.
Once you have it like you like, cut it out. Don’t worry we will flip it over so you don’t see any of the lines from other attempts.
Do the same for the trunk of the tree. This takes a little more practice. If you want just a straight tree it is pretty easy, I wanted mine to have some curve.
 |
| My helper |
Repeat for the top of the tree. Again, I just wiggled my marker around a few times until I got the shape I was looking for.
Cut it out and then lay it out to make sure you like it. Remember to flip it over so all the marker is face down. I trimmed mine a few more times once I saw it all together. Take your hot glue gun and glue all of the pieces together, it adheres to felt really well.
Now go outside and grab some leaves. I just grabbed the two closest to the door, it was cold that day!
Trace them onto your felt sheets, Don’t worry about them being perfect, leaves aren’t perfect
 |
| Sorry, I cut before I took a picture |
Make sure to cut enough for 30 days, I did extra, and lots of colors. Lay them out again to make sure you like it.
Take a roll of sticky back velcro, you will only need the scratchy side, and cut out pieces for each of your leaves, stick the sticky part on the back.
Next take your Heat and Bond and iron it onto your fabric. Follow the directions on how to do this
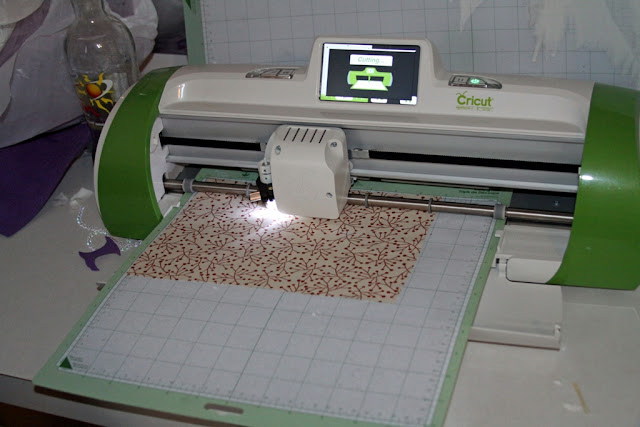
Cut your letters out of your fabric, if you are talented enough to free hand or trace, go for it, like normal I used my Cricut
Take your letters and iron them onto your tree
Make sure you iron out your felt and fabric really well to get all of the wrinkles out. I also lint rolled mine, felt really collects junk.
Now you are all set to lay out your leaves, velcro them onto the tree top, the sharp part of the velcro will stick right to the felt without having to use the other piece. You can do it however you want…I enlisted some help
And you are all set! Hang it on a wall or a door, I used 3m double sided tape with the little pull tabs. I used some tape rolled in a loop to help hold down a few extra places.
I really enjoyed making this. I feel like there are a lot of lessons attached to it. Before dinner each night I plan to have Eliza find the # of the countdown for that day, so number learning, and then at dinner we will tell each other what we are thankful for that day. I also made extra leaves in the hopes that maybe she will want to take one down throughout the day to tell me she is thankful for something special…a mom can hope right?
And in case you were wondering, here is Pottery Barns countdown. It is available only in the catalog
Thank you everyone for checking out my tutorial. Feel free to stop over at And I Thought I Loved You Then for more tutorials like:


I’m linking up to the Friday parties on this page.
XOXO
Diana
www.thegirlcreative.com


Love this Idea! Think I need to do this for Christmas!
How easy is cutting fabric with the cricut? Any tips?