I’ve been loving PB’s girly lamp for quite awhile:
| Pottery Barn Kids |
I knew my poor little Target lamp had the perfect make-over potential. She was just waiting for her day at the spa for a facelift!
I purchased this on clearance about 4 years ago. I know I wouldn’t have spent more than $15 for it.
I started by ripping about a million and seven 65 strips 20″ x 2″.
Then I had to de-thread the edges. The charmeuse fabric I used was SOOO stringy!
Then I stitched down the sides with the tension on the tightest and stitch length on the longest. So for my Singer Simple that meant turning the knob on the left to 9 and the one on the right to 4. 🙂
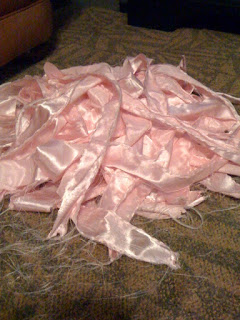
I didn’t worry about backstitching ends or anything. Just zipped them out really fast and ended up with a big pile of fluff:
Before this, I did attempt to do a different flower I’ve seen lots lately. The one on the right was rolled. I actually liked it better, but they took much longer, and they took up less space, so I would have had to do two million instead of just one million…
Since I had so many to do and since I knew it wasn’t going on something that will be touched or played with, I figured I’d cheat and skip any hand-stitching of the ruffles when rolling them into flowers. I just cut out circles of flannel (it’s what I had on hand) and hot glued the flowers right to the circles.
Under side after flowers were glued to circles.
I kept three ruffled strips and glued a strip at the bottom:
Then started gluing on the flowers:
I used the one lonely rolled flower to put over the pull chain temporarily. I plan to buy a cute jewel to put there instead.
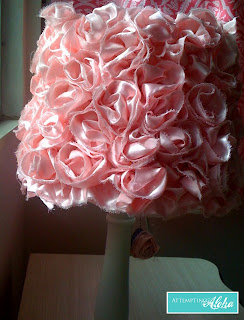
Here she is all lit up at night:
And in her new home:
She has lovely views!
XOXO
Diana
www.thegirlcreative.com






Gorgeous makeover!!
so pretty! love your version!!
Soo pretty! You did great! 🙂
I love the little rosette on the pull! So thoughtful.
Yanet of 3 SKBs
Looks adorable! Very very cute, considering it is pink, my daughter would LOVE this in her room :)…off white or cream, and it is MINE! Lol
Your lamp is so cute. I made a small lampshade this week too, aren’t they so fun to make. I love the pink roses.
Can’t wait to do this. It’s so cute!
Very pretty. Great low cost knockoff!
I love this! I can’t believe you made if for 90% off the original cost.
that is super impressive!! Love it!!!
This lamp is so pretty! It’s amazing how little you can spend on something that looks so expensive. I love it!
Melanie
youmadethat.blogspot.com
That is so beautiful!! I will have to try this!
Thanks for sharing this!
Justsewsassy.com
This lamp Rocks!
amazing lamp makeover!
I love this blog. As soon as I push ‘post comment’ I am headed over to the side bar to follow you!
OK what a great job!!!
I love it!
I wanted to say thanks for stopping by my blog! And hello…where have I been, your blog is fabulous!
I’ll be here for a very long time tonight 🙂
XO
Kristin
I like that version better than the original! My daughter would LOVE it.
Gabby
http://www.lateyoungfamily.blogspot.com
I like yours better! How very cute and feminine. Thanks for the inspiration!
I am obsessed with your blog! I bought myself a sewing machine for Christmas but don’t really know how to work it yet. I will most definitely be following you and your creative posts! Fabulous lamp!
(http://funandfabulouslife.blogspot.com)